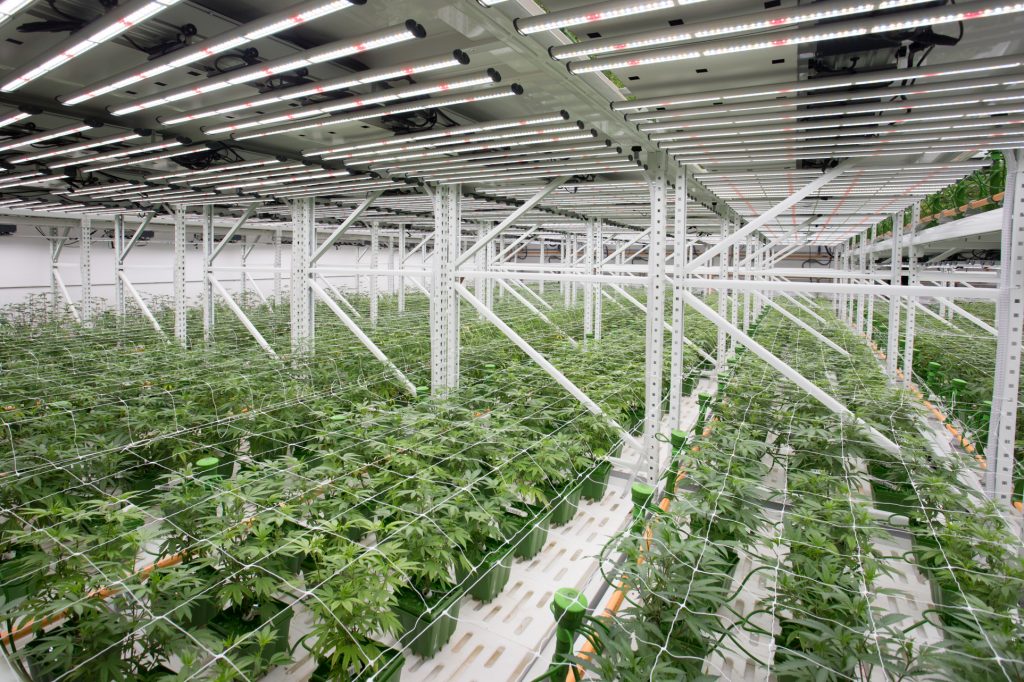
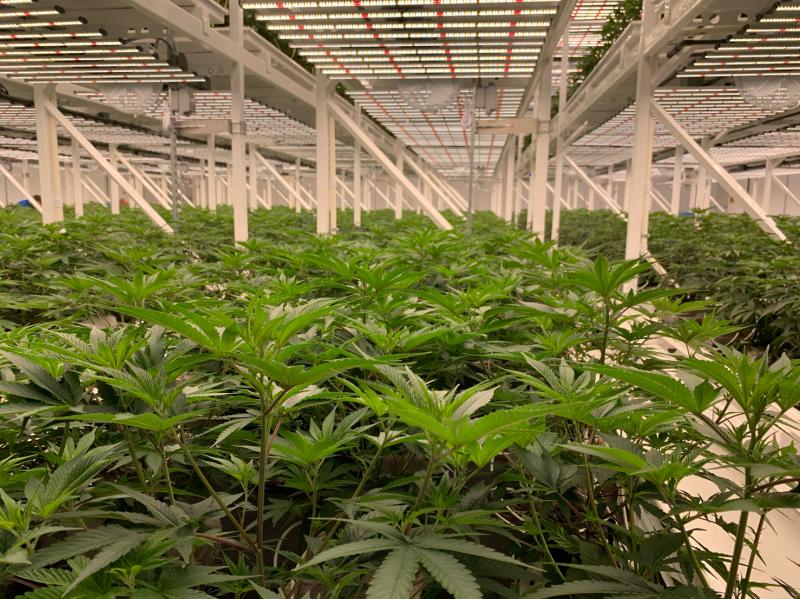
Major Benefits Of LED Grow Lights

Over the past fifty years, the experienced grower has used innovation to accommodate the problematic by-products created by High Pressure Sodium (HPS) bulbs. To compensate for excessive heat, energy, and spectrum emissions from older grow light fixtures, growers are forced to invest in costly ventilation systems and let light dictate growth.  

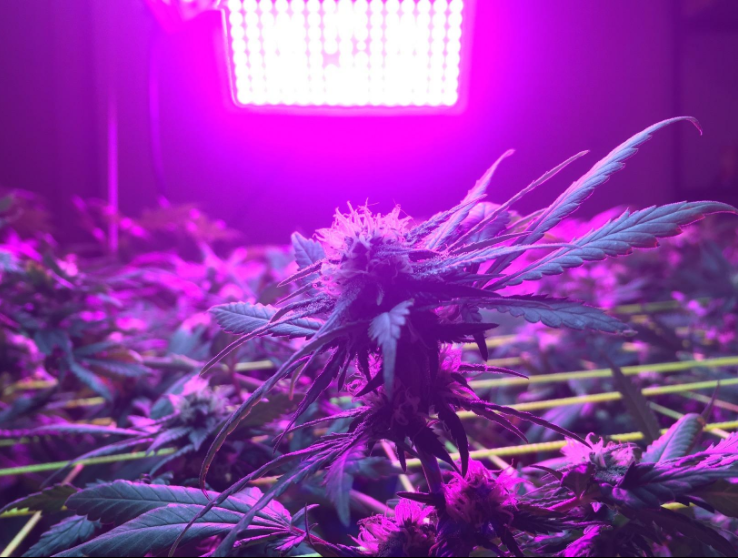
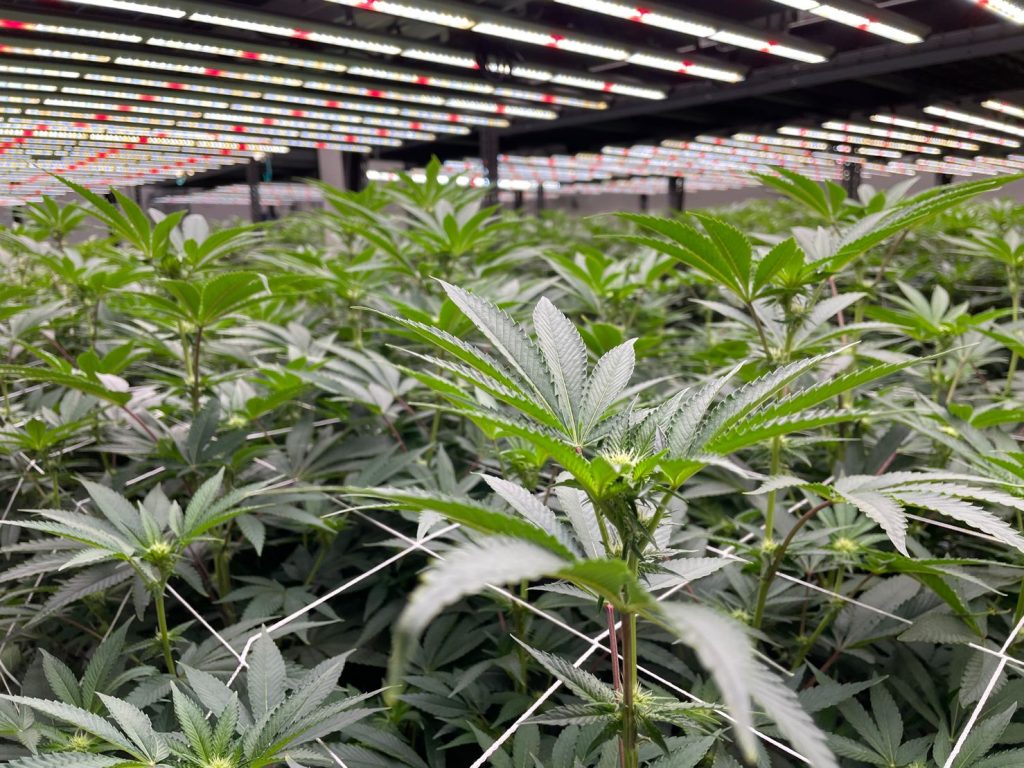
Luckily, this no longer has to be the case. With the same level of ingenuity, LED technology is continually being developed to address these difficulties. LED Grow Lights have been designed to maximize spectrum and coverage, while minimizing wasted energy and dangerous heat. These lights meet the needs of the crops, not the other way around.

Below is a quick list of why we at Aokairuisi Grow Team are excited to offer a wide selection of LED Grow Lights, and how they can improve a residential or commercial operation. 

Controllable

Temperature: Because LED lights run significantly cooler than HPS equivalents, growers have greater control of the environment temperature, as well as the crop’s exposure to heat.

Spectrum: All our fixtures have been designed to emit the necessary spectrum for ideal plant absorption, rather than untargeted wavelengths common in HPS. 

Stage Growth: Fixtures like our LED Panel Plant Grow Light Full Spectrum Commercial Indoor are built with switches that allow growers to adjust the brightness for the changing needs of their plants.

Space Needs: With compact construction and versatile hanging heights, our fixtures can adapt to limited space, or cover large operations.

Better for Environment and Community 

Indoor plant cultivation is an energy-intensive industry. And as the door of the cannabis market continues to widen, greater demands are being placed on local utility companies and communities.

LED grow lights offer more targeted light solutions while consuming 50-70% less energy than standard practices. Operations that increase in energy-efficiency lessen the burden on surrounding communities. 

Without compromising on quality brightness, LEDs also reduce the emission and use of harmful substances:

Less Heat: LEDs run cooler than HPS bulbs, not only streamlining ventilation process and costs, but also lowering environmental impact. 

Less Chemicals: LED grow lights allow a highly controlled environment for plants, greatly reducing the need for pesticides and chemical treatments on plants. 

No Mercury: With durable construction and guaranteed warranty, it should be a long time before growers consider replacing their LED fixtures. When the time comes, however, these lights are safe to throw away because they do not contain toxic mercury.

Better for Business 

Every business aims to improve processes in order to cut losses and increase profits. For indoor cannabis growers, lighting makes up nearly 40% of energy costs. By investing in long-lasting LED fixtures, grow operations take large steps forward to improving the efficiency of their company. Aokairuisi Grow Team partners with growers by offering a quality line of grow lights and knowledgeable US-based customer service for any project.

Start enjoying the benefits of LED grow lights today!

Six Ways To Maximize The Benefits Of LED Grow Lights

With the development of LED technology, LED grow lights provide indoor growers with the opportunity to reduce the overhead of their operations while increasing the quality of their plants. As we know, LED lighting does not generate a significant amount of heat. So indoor cultivators find that they do not have to cool their grow spaces to the extent needed when using HID lights. In addition, the directional lighting provided by LED lights is much more energy efficient than HID or HPS grow lights. As a result of these factors, growers who switch to LED grow lights realize as much as a 60-70 percent drop in their electricity bills.

Switch To LED Grow Lights To Improve Plants Yields Efficiently

Electricity expenses constitute a major part of the overhead with indoor farms and gardens. So the cost savings alone are enough to motivate people to make the switch to LED lighting. Once growers successfully transition to LED grow lights, they soon discover another bottom line benefit – improved quality of their plants as well as increase yields. From the results we’ve tested, high-quality LED grow lights increase plants yields by 50 percent and plants grow 2.5 times as fast when compared to grow operations using traditional illumination. What do you need to do after make your switch to LED grow lights ?

How To Maximize the Advantage Of The Benefits Of LED Grow Lights

LED grow lighting provides an efficient source of directional light with less heat output compared to HID and HPS lights. Growers find they have to make adjustments in their grow operations. These tips below will help you maximize the advantages of using LED grow lights.

1. Monitor the Temperature of Your Grow Room

Growing operations using HID lights require a high level of cool air circulation to prevent the plants from dehydrating. Growers who switch to LED lighting find the grow room environment much cooler than when they used HID lights. That is because LED grow lights convert electricity to light directly. Another advantage of LED lights is that they do not leave a thermal signature. When transitioning to LED grow lights, make sure keep a close watch on the temperature of your grow room to maintain an optimal environment for your plants.

2. Avoid Overwatering Plants

Since HID lights generate a significant amount of heat and infrared light, which both cause water evaporation, growers have to water their plants frequently to make up for the water loss. However,LED grow lights are a source of low output lighting and the do not generate light in the infrared spectrum. So plants and soil tend to retain water. In fact, indoor grow rooms using LED lighting use 80 percent less water than outdoor operations.

3. Automation Provides Defined Light Cycles for Optimal Plant Growth

In nature, light provides plants with a rhythm that defines periods of growth, flowering, and dormancy. For optimal plant growth, indoor growers need to mimic these light cycles. The easiest way to provide plants with the appropriate amount of exposure to light is to automate your LED light setup with a timer. Remember a plant’s need for light exposure changes during its life cycle. For example, a plant during its vegetative phase requires 18 hours of light, while reducing its light exposure to 12 hours each day triggers flowering.

4. Pay Attention to the LED Recipe Used in Your Grow Lights

Just like plants require different lights cycles during various stages of their development, they also need specific wavelengths of light during various growth periods. In general, plants need exposure to light in the blue, white red, and far red spectrums. Keep in mind that dark green leafy plants need exposure all blue light wavelengths to thrive, while exposing flowering plants to light in the far red range decreases the flowering time, which means less waiting time before harvesting the crop.

5. Pay Attention to the Height When Mounting Your LED Grow Lights

Plants use 100 percent of the light generated by LED lights, as opposed to 10 percent when HID light are used. So growers find they need to mount their LED lighting systems lower than their old HID lights since there is virtually no heat emitted from LED grow lights. Additionally, the placement of the light needs to provide even light distribution while allowing penetration into the plant canopy.

6. Install Multiple LED Grow Light Units

By installing several LED grow light units, you permit the light to overlap, which maximizes the light distribution. This efficiency provides appreciable savings in electricity costs.

As a Grower, you can follow these recommendations when they switch to high-quality LED lighting. You will find you quickly realize a positive return on your investment.

7 Tips And Tricks You Can Use To Turn Yourself Into An Expert Gardener-Part II

As we discussed in the last blog, you’ll need to know some tricks of the trade to master your gardening efforts. Below are the rest tips and tricks:

5. Bring Dead Plants Back to Life

It can be devastating when your plants that you’ve been working hard to keep alive start to wither away. Unfortunately, you can’t resurrect plants once they’re completely dead but you can bring them back to life if they’re still holding on.

Try some simple steps including trimming the dead stems and leaves and reducing sun exposure by half. You should also water it lightly and monitor it.

6. Protect Your Garden

One of your duties as an expert gardener is to keep your plants safe. Fighting pests and diseases from your garden can be a losing battle if you don’t take care of it the right way. It’s important to note that you can use both natural and chemical methods for pest control. However, any treatment will take at least two weeks to be effective.

Here are ideas of how to protect your garden:

Good sanitation

Practicing cleanliness is the best way to keep your garden free from pests and diseases. Pests won’t have anywhere to hide when there isn’t excess debris around.

Invite good insects

If you realize there are harmful insects, the best way to deter them is by adding insects that are beneficial for the plants. Consider inviting bugs such as hoverfly, honeybee, lacewings, praying mantis, etc.

Eliminate the sickly plants

With time, you may start noticing some sickly plants as a result of being ravaged by disease and insects. The plants aren’t healthy and they don’t have strong roots.

Remove them quickly but don’t compost them. This will ensure the bugs and disease don’t spread. In the process, handpick the big bugs that you can spot easily such as squash bugs, cabbage worms, beetles or slugs.

Natural sprays

If you’ve been using insecticides or pesticides with no success or you want to grow your plants organically, try natural options. You can try using things like mineral oil, garlic spray or salt spray.

7. Track Your Progress

Tracking makes everything measurable. It allows you to know whether your plan is working or not. After planting your seedlings, journal what you expect from your garden at every step.

For example, after how long will you move your seedlings from the nursery? This will allow you to know what to expect at every stage. You can also seek guidance and correct any errors before it’s too late.

Start on the Road to Becoming an Expert Gardener Today

Some people were born with a natural green thumb but even if you weren’t there’s no need to worry. You can still become an expert gardener by following some of these tips diligently. The most important part is to start small, be consistent and trust the process.

Gardening is truly an art and takes time and practice. For more tips and tricks, check out our blog.

7 Tips And Tricks You Can Use To Turn Yourself Into An Expert Gardener-Part I

There are many reasons why people decide to learn gardening. Some of the leading reasons include saving on grocery costs, growing organic vegetables and fruits, while others do it as a hobby. Any of these are exciting for growing enthusiasts.

Regardless of your reason, you’ll need to know some tricks of the trade to master your gardening efforts. Check out this article for 7 cool gardening tips that will turn you into an expert gardener even if this is your first time in the garden.

1. Do Your Research

There is a lot that goes into gardening─ sometimes it may seem overwhelming. Yet, it is possible to start from scratch and make a good harvest if you’re well prepared. Before you decide on the best grow lights, (Shop) fertilizer, or even plants to grow to talk to an expert.

An expert will help you understand the best type of plants to grow based on the conditions of your environment and your availability to tend to the plants. For example, some plants will require up to eight hours of sunlight while others can survive with limited sunlight.

Watching videos, reading books, and speaking to others with experience will give you a good foundation for the craft.

2. Start Small

One of the mistakes that novice gardeners make is starting too big. As much as you may be excited to share your produce with your family, it’s best to get started with a small portion. This allows you room for mistakes and a chance to learn all the shortcomings you need to conquer.

Starting at a smaller scale also helps you avoid getting too discouraged and overwhelmed by the whole process. You can add more plants as you gain experience.

It’s also advisable to start with plants that do not require too much work. For example, protecting broccoli from pests can be very challenging and requires diligence. On the other hand, growing zucchini is super easy.

3. Remember to Label Your Plants

If you’re planning to plant multiple plants, being able to identify them as they develop may be a challenge for first-time gardeners. To avoid confusion that may result in you providing your plants with the wrong nutrients, consider labeling them. You can use DIY materials such as popsicle sticks or chopsticks to label them.

4. Save on Costs

To be an expert gardener, one thing you have to learn is cutting on costs when you can. There are plenty of things you can do to reduce your startup costs for your garden. Here are some ideas:

Harvest Water

If your water bills are high, gardening can be very expensive. However, you can collect water when it rains and use it during the dry season.

Use Old Jars as Watering Cans

This is an excellent idea if you just started farming and you don’t want to buy a watering can. This is also a great recycling idea.

Get Creative With Your Garden Structure

You may be thinking having a garden is impossible due to your limited space. However, there is a variety of ways to actually structure your plants. Try out different types of methods, such as stacking planted pots in vertical furniture.

The Guide To Grow A Cannabis Garden

Numerous individuals have engaged in growing a weed plant in their home yet don’t have a clue where to start. That is the reason we’ve assembled this article, beginning with the eight fundamental strides to developing weed that will go on to be sold on online dispensaries. Remember that this is an undeniable level outline that clarifies the arrangement and vegetation cycle through collect. Further clarification regarding how to develop weed at home can be discovered later in this article.

Set up a Grow Space

This could be your lawn, a storage room, or a tent in a cellar. It’s totally up to you and your particular space accessibility. The significant thing to remember is that regardless of how huge or little the space, the objective is the equivalent—to mimic the common habitat in which plants develop: nature. We emphatically suggest developing inside and further clarification can be discovered later in this article.

Acquire Cannabis Seeds

There are two different ways to start developing cannabis: from seed and from clone. Cannabis seeds are exactly what they sound like—seeds of the cannabis assortment. You can discover cannabis seeds available to be purchased at dispensaries and online seed banks. The option is to begin from a clone—plainly the part of another plant that has set up roots. The advantage to clones is consistency; you know the plant the clone came from and can anticipate a definite copy—subsequently, the name.

In any case, knowing how to store cannabis such as shatter the right way will ensure you get longer lasting cannabis. By making your cannabis seeds and weed strains stay fresh for longer, you can make it last for months.

Pick a Grow Medium

You will likewise need to pick which medium to utilize: for example soil or aquaculture. In soil, the seeds will get sprouted first and afterward planted in the developed medium to start their new life.

Clones can be planted into soil or another developed medium when they have set up roots. You can drive a slicing to develop roots various ways—utilizing an aeroponic cloner, utilizing establishing plugs, or in any event, setting the cutting in some water.

We firmly suggest filling in soil for its advantages to you and the Earth. Further clarification can be discovered later in this article.

Vegetative Growth

This is the second stage in the vegetation’s cycle (after germination). As the plant’s root framework gets more settled in the developed medium, vegetative development will be quick and energetic.

Vegetative development is the stage where the plant is utilizing photosynthesis to develop shoots, leaves—the mass it should bloom and recreate in the following phase of life.

Flowering

After the vegetative stage, the plant will change into the bloom stage. This is the time wherein the plant starts delivering… you got it, blossoms!

The changeover from vegetative development to the blooming stage is brought about by the light cycle—more limited evenings bring about vegetative development and longer evenings (12 hours) bring about blossoming.

Contingent upon the assortment of cannabis you are developing (for example indica or sativa), the blooming stage can last somewhere in the range of six to more than about four months.

Harvesting

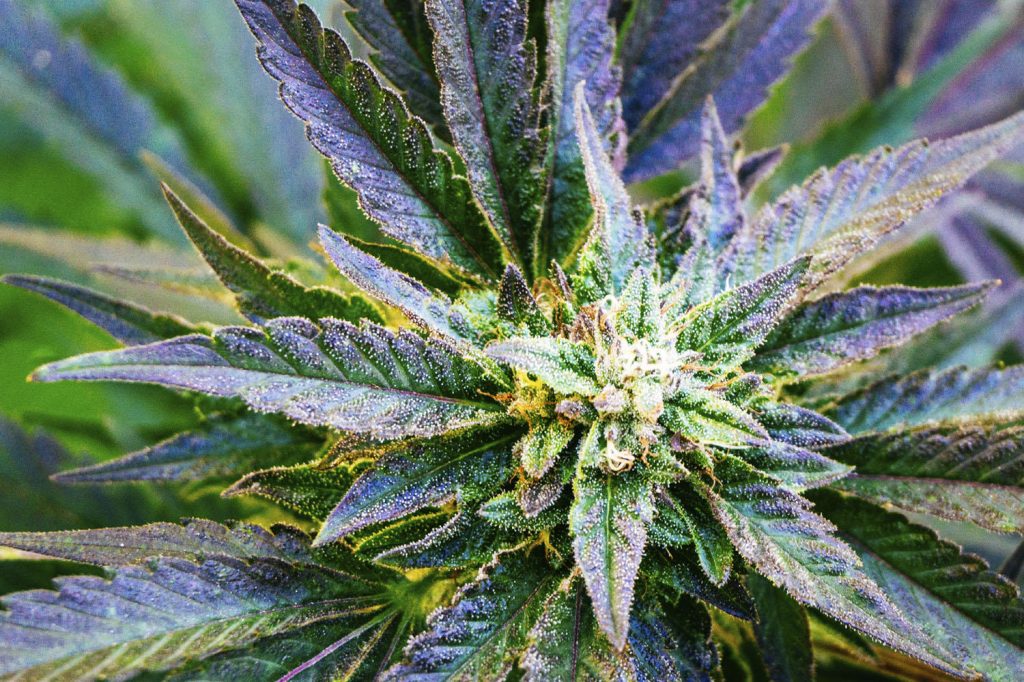
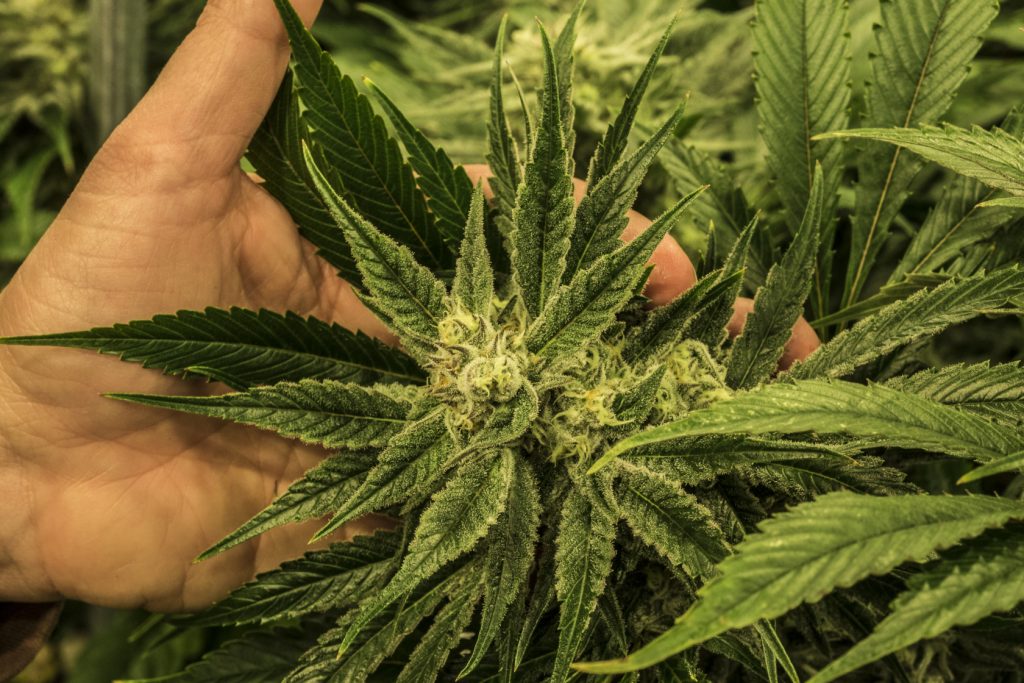
Toward the finish of the blossoming cycle, the buds will be weighty and canvassed in trichomes—the little bulbous hairs containing the THC, CBD and other cannabinoids you endeavored to develop.

Each strain has what is known as a gathering window—the restricted time period were the strain ought to be reaped for greatest power, flavor, and impact.

For certain strains this is only a couple days and for other people, it keeps going weeks. At the point when the plant is fit to be collected, just cut the plant down at the base.

Dry, Trim and Cure

Subsequent to chopping the plant down, the blossoms won’t look like buds that you are accustomed to smoking. That is on the grounds that the blossoms actually should be dried, managed, and relieved.

A newly gathered plant is loaded with dampness that should be taken out preceding smoking. Plants are commonly hung topsy turvy by their tail for one to about fourteen days to dry.

After that time, the leaves encompassing the buds are cut back, uncovering the buds that we are altogether so acquainted with.These dried and manicured buds would now be able to be put away in glass bricklayer containers to fix—the cycle wherein the intensity, flavor and smell of the bud is upgraded.

Five Secrets To A Successful And Fruitful Indoor Garden

These days, you don’t need a fancy homestead to grow your own fruits and vegetables. Around 60% of people who grow fruits and vegetables grow them indoors. With the right tools and mindset, you’ll have a beautiful garden of your own without having to step outdoors. In this guide, we’ll go over the five secrets of indoor garden success.

1. Get an LED Grow Light

One drawback of gardening indoors is the lack of sunlight. However, there’s a simple solution to this problem—an LED grow light. An LED grow light mimics sunlight and aids photosynthesis.

LED lights last much longer than traditional bulb lights. They also come in different shapes and sizes, depending on the size of your plants. If you plan on making a large indoor garden, consider building a modular set with LED grow lights installed above the plants. View some nice options here: Shop

2. Pick the Right Plants

When choosing what to grow, it’s vital to consider your living space and geographical location. If you’re a beginner, you may also want to consider growing plants that are easier to handle.

These plants thrive in cooler spaces with indirect light:

  • Radishes
  • Herbs (Rosemary, Basil, Thyme)
  • Succulents
  • Bell Peppers
  • Tomatoes

Whichever plants you choose to grow, take some time to research the individual plant species and study what makes them grow healthily. 

3. Don’t Over-Water Your Plants

Over-watering your plants is harmful and may end up killing them due to waterlogged soil. Waterlogged soil prevents your plants from absorbing oxygen. If the plant can’t get enough oxygen, the roots start to decay. Decayed roots are unable to absorb nutrients, so the rest of the plant decays, as well. Researching how much water your plant needs helps prevent over-watering.

4. Remember To Re-Pot

Re-potting involves moving your plant and soil into a new pot. Usually, this is because your plant has overgrown its current pot, but it’s important to re-pot your plants regardless of growth because new soil provides more nutrients. When moving a plant into a new pot, handle it carefully, and wear protective gloves. It’s easy to damage your plants during this process, so take your time. Your plant’s pot should include a proper drainage system to prevent mold. Some plants need special pots or extra room to grow, so make sure you research your plant’s needs beforehand.

5. Pick the Right Soil

Soil is much more than just a pile of dirt you’d find outside. Gardening soil is a potting mix devoid of pests, chemicals, and bacteria. Your plants won’t grow properly if you simply pot it with the dirt in your back yard. Instead, opt for professionally mixed soil from your local hardware or gardening store.

The type of soil you need depends on the needs of your plants. Some plants require a mix of lightweight soil, vitamins, and plant food. Before you place your plants into a pot, make sure you purchase the perfect soil mix.

Your First Indoor Garden

By following these simple tips, you’ll have a budding indoor garden at your fingertips. With your indoor garden, you’ll be able to enjoy fresh fruits, vegetables, and herbs no matter what size your living space is.

Best Time Of Day To Harvest Cannabis

It’s finally here! The day you’ve been waiting for: harvest time. After months of watching your babies grow and produce monster buds, you finally get to collect those buds. And that brings you one step close to enjoying the fruits of your labor. But you don’t want to screw things up so close to the finish line! Does it matter what time of day you harvest your weed? And if so, when is best? Keep reading to find that out, plus everything else you need to know about the best harvest time for marijuana.

Is It better To Harvest In The Morning Or At Night?

The best time of day to harvest cannabis is in the morning, just before the sun is up in the sky. That is when the terpene levels are at their peak. But there are many other reasons to harvest at dawn.

Reasons To Harvest Cannabis In The Morning

  1. Terpene levels are the highest just before the sun comes out. Ideally you want as many terpenes present in your plants as possible when you harvest.
  2. Cannabis plants soak up sun in the day and produce resin and other goodies at night; the production cycle is at its peak in the morning before light.
  3. Harvesting before first light is just more efficient overall, because you have a full day ahead of you to get your harvest chores done. It just makes sense time-wise.
  4. The weather is nicer before the sun comes out; even indoors before the hot lights come on, you can harvest while remaining in a comfortable temperature.

What A Plant Produces At Night

At night, marijuana plants producing more resins, oils, buds, THC, and of course terpenes. Providing you plan your harvest correctly season-wise, cutting the girls down in the early dawn ensures they are at their fullest point, containing the most ‘juice’ at any point in the photosynthesis cycle.

Harvesting Efficiency For Humans

Getting up before the sun is known to have health benefits, and it just makes logical sense. If you have a large grow room with many plants, it is not a good idea to start harvesting at 3pm.

Whether you have a small team or you are solo harvester, get in there before the sun and you will have a much more productive day.

Your body works better when you go with your circadian clock, which wants you to wake up just before the sun and get to work. Get to work before the sun and finish up when the sun sets, and you will produce better cannabis (or anything else you are working on). It is simply good for you!

Temperature Matters At Harvest

When the sun comes out and starts blasting you with its radioactive rays, you get hot and your energy will wane over time as you are in the sun.

Harvesting when the temperature is nicest (before the sun is up) makes good sense. You work better and get more done, if you do not have to worry about being overheated and thirsty all the time.

Early morning is the best time of day temperature-wise in almost every climate known to produce good cannabis. Harvesting many plants is a lot of work to begin with and trying to complete such a big job while fighting the clock is not a good idea.

There does not seem to be a significant reason as far as the plants are concerned to harvest before it gets hot, but it makes a big difference to the people doing the harvesting!

What Is Bad About Harvesting In The Afternoon?

Besides being hot the entire time, your plants are going to be in the soaking up light state, and not pushing out the moisture to their buds.

This means you will get drier, less juicy buds on your plants, which is not ideal. This is in addition to the lower terpene count. And if you stop watering before harvest, as many growers do, the buds will already be less moist.

How Long Does It Take To Grow A Marijuana Plant Indoors-Part II

From the previous blog, we learn that there’re five stages of cannabis growth, they are:

  1. The germination stage
  2. The seedling stage
  3. The vegetative stage 
  4. Flowering stage 
  5. Harvesting stage

Depending on your cannabis strains and the growing method you use, these stages can last up to 3 or 5 months on average. Here is a breakdown of these stages of growing indoors. 

Step 1. Germinate the seeds: 12 hours to 8 days

The first marijuana growth stage is the germination stage. It can last for 12 hours or 8 days. A typical mature cannabis seed should be dry and hard in texture. It should also be dark brown. If the seeds are green or white in color and somehow soft, then they are underdeveloped seeds and may not germinate even under the best conditions. Ensure your seeds are mature and easy to germinate. Alternatively, you can use clones and skip the entire germination phase. 

Once the seeds have sprouted, you can transfer them to a growing medium such as soil. You can grow them in pots or on the ground inside your grow tent. The plant will develop a tap root that will go deep into the soil as the stem springs upward. 

From the stem, two round-shaped cotyledon leaves will sprout up as the plant springs free from the seed’s protective casing. The new delicate leaves will draw insufficient light the plant needs to grow healthy and strong. As the roots continue to grow, the plant will produce its stalk, followed by buds. At this point, your cannabis plant is now a seedling. Throughout the germination stage, your plants will need an uninterrupted light cycle of 16 hours per day. 

Step 2. Seedling phase: 1 to 4 weeks

Once your cannabis plants have grown into seedlings, they will develop lots of cannabis fan leaves. At first, the leaves will have only a single rigid blade which will culminate into many more blades as time goes by. By the time your plants complete the final growth stage, they will have produced an average of 7 blades per leaf. However, some cannabis strains may develop more than seven blades per leaf.

If you notice your cannabis seedlings are dark green with a vibrant look, then they are growing normally and are healthy. This is also a good indicator that they are receiving sufficient light. However, it would be best if you took care not to feed your plants excess water while in the seedling phase. This is because the small roots only require a minimal amount of water to thrive.

It is also in the seedling phase that your marijuana plant is susceptible to disease and mold. Therefore, always keep your grow space clean and regulate the temperatures to ensure no excess moisture in the growing environment. Furthermore, ensure the plants receive sufficient light. The average light required in the seedling stage is 16 to 18 hours of light per day. Therefore, ensure you have the best type of grow light to help your plants survive this delicate stage. If you’re not sure about choosing the best grow light, kindly contact us or visit our shop: Shop

Step 3. Vegetative phase: 3 weeks to 6 months

Your cannabis plants will begin to grow effectively in the vegetative stage. When your transplanted seedlings reach this point, they start to develop roots and foliage more rapidly. The vegetative stage is also the time to begin training and topping your cannabis plants. It’s also when your plants require a lot of water around the stock and roots, so you should increase their water intake. 

After 3 weeks in the vegetative stage, the roots will stretch outward, at which point you should concentrate on watering in the soil away from the stalk. This will enable the roots to spread out more efficiently and absorb water, soil and nutrients. When in the vegetative phase, your plants need healthy soil rich in nutrients, so ensure they receive sufficient nitrogen. 

A few weeks into the vegetative phase, and your plants will start producing sex organs. This is the ideal time to determine the male vs female sex of each plant, and get rid of the males. Getting rid of the males in the vegetative phase is significant in preventing them from pollinating the females. In this stage, your plants also require uninterrupted quality light (DIL), so ensure you provide not less than 18 hours of light each day.

Step 4. Flowering phase: 6 weeks to 3 months

The flowering phase is the final stage of the growth of a marijuana plant. Once the plants start flowering, they will develop reisin-like buds, indicating they are healthy, fertile, and with promising yields. Most autoflowering strains start flowering when they are 6 or 8 weeks old, but most Sativa strains typically take a longer flowering time.

If grown outdoors, the plants will naturally start flowering as they absorb natural sunlight. This transition is perfect at the end of summer and the onset of Fall when there is less sunlight. However, you can trigger and accelerate the flowering phase of your indoor grown plants by reducing their light cycle from 18 hours a day to 12 hours.

The flowering phase also contains three different substages, which are the flower initiation period, the mid flowering period, and the late-flowering or ripening stage. The flower initiation period can occur when the plant is 2 to 3 weeks into the flowering stage. At this point, the plant continues its average growth, and the females start to produce pistils, the pre-flowers, that enable buds’ development. 

In the mid flowering stage, your cannabis plants cease to grow, and the newly-developed buds grow thicker and fuller. This phase occurs at the 4th or 5th week of the flowering stage. By week six, your plants will enter the final period of the flowering phase, which is the ripening period or flowering time.

In this phase, the plant’s trichomes increase in density, and the plant develops a sticky texture. When this happens, be sure to pay close attention to the changing colors of the pistils, as this will help you determine if the plants are ready for harvesting.

Step 5. Harvesting: 1 to 5 days

The time needed to harvest cannabis plants varies from one grower to another and the existing conditions necessary to grow cannabis. For instance, harvesting is normally done in Fall for outdoor grown plants. However, indoor plants can be harvested any time of the year since they don’t depend on natural environmental conditions to grow. 

Once your indoor plants attain maturity and the harvesting stage, then it is time to reap the fruits of your careful and delicate labor. The only challenge is knowing when your plants are ready for harvest and how to do it carefully. Early or late harvest may affect the smell, taste, and potency of your marijuana produce. 

Once your plants leave the flowering stage, observe the changing colors of the pistils of your female plants. If the pistils turn slightly brown, then they are ready for harvest. On the other hand, if they are too brown, then your plants are overripe, and you may have missed the crucial moment when you should have harvested them. 

An easier clue to help you ascertain if your marijuana plants are ready is to observe the leaves and stem of the plants. Yellow leaves indicate that the plants are ready for harvesting. Swollen stems and yellow leaves that fall off suggest that the harvest time has passed, and it’s too late to salvage your plants. At this point, your weed will be too bitter and the smell unpleasant, making it worthless. Therefore, the earlier you harvest them, the better.

How Long Does It Take To Grow A Marijuana Plant Indoors-Part I

The total time it takes to grow marijuana plants depends on many factors. These factors, as we discuss below, will determine how long it takes for your weed to be ready for harvest. On average, it takes about 3 to 4 months to grow a marijuana plant indoors.

A more detailed explanation is that the complete lifecycle of your cannabis plants from seed to harvest can take anywhere from 2 to 7 months, or even more depending on your conditions (like which indoor grow lights or grow tent you are using). That’s quite a long time, but you can shorten it if you use creative growing techniques like the sea of green growing method (SOG) to accelerate the vegetative or flowering stage. This method of growing indoors also brings in better yields. If you’d like to learn more about SOG: What Is The Sea Of Green Growing Method-Part I

As a new cannabis grower, it’s important to understand the basics of marijuana growth and how long it takes to grow it indoors. Keep reading to learn more about the step-by-step guidelines for the whole growing process.

Time needed to grow weed from seedling to harvest

Knowing the exact factors that affect your grow operation will help you budget how much time, money, and effort required to get your marijuana ready for consumption.

Many factors such as the type of cannabis seed strains you want to grow, your indoor growing tent setup, the size of your weed project, and the technique you will use all determine your total growth time. An important point to note is that bigger marijuana plants take longer than small plants grown using the SOG method.

Therefore, weed can take around 12-20 weeks growing indoors. From seed to harvest, it’s around 3-5 months and another extra 2 weeks. The additional 2 weeks can be used to dry and cure your marijuana to improve its potency and retain its natural smell. More information and a detailed breakdown of the total time it takes to grow marijuana are provided in this article to help you plan and achieve your targeted harvest time.

Before you start growing weed

The entire preparation time can take up to 2 weeks or more. This includes the time needed to get your equipment and source for the marijuana seeds or clones. 

Step 1: Getting your equipment (likely 1 day to 2 weeks)

An average of 1 day to 2 weeks may be sufficient for you to purchase all the equipment you will need to cultivate marijuana. You can reduce this time if you buy the equipment at your local hydroponics shop. Once you have all the physical resources necessary to grow weed, the next step entails setting up your growing space and equipment. An average growing setup can take a few hours or a weekend afternoon. The whole process can last a day or 2 weeks, depending on the procedure you used to purchase your equipment and the time needed for shipping (if necessary).

Step 2: Getting your seeds or clones (likely 1 day to 4 weeks)

If you are a regular cannabis grower, you can harvest and preserve seeds from your mature plants. You can also trim off mature buds beneath your marijuana plant before harvesting and keep them as clones.

Alternatively you can obtain clones or seeds from local growers. If this is beyond you, then consider ordering clones or seeds from a seed bank. Since this alternative involves shipping, the time it takes to receive the seeds can be 1 day to 3 weeks or more. 

How much time is needed to grow Marijuana: stages of growth

Cannabis plants pass through several stages of growth before they are ready for harvesting. During these development stages, the plants require different amounts of nutrients, water, and light. You must understand these stages, their durations, and what each plant needs at every stage. This will help you know when to train your plants, when to trellis them, and when they are ready for harvest. 

These five stages of cannabis growth include:

  1. The germination stage
  2. The seedling stage
  3. The vegetative stage 
  4. Flowering stage 
  5. Harvesting stage

Depending on your cannabis strains and the growing method you use, these stages can last up to 3 or 5 months on average. Here is a breakdown of these stages of growing indoors. 

To be continued…

Leaving Grow Lights On 24 Hours: Right Or Wrong?-Part II

There’re some pros and cons to leave the grow lights on 24 hours. Then, what is the best way to provide more light?

The Best Way To Provide More Light

As mentioned, the only real advantage to running your lights all night long is that it allows you to provide your plants more light throughout the day, without having to buy new or additional lighting equipment.

But if your plants are not getting enough light, you should buy new lights. These can either be lights to replace your old fixtures, or ones to run in addition to your existing plant light fixtures.

If you don’t have sufficient light for your plants to grow properly during vegging, you certainly don’t have enough for them to produce a good yield during flowering. You’re going to need more lights anyway. There is really no point in running your existing lights 24/7 during vegging and compromising the plant’s health as a result. Just get additional lights. Shop

The Best Lighting Schedules For Cannabis

We’ll start with flowering, because there is no flexibility to increase the daylight hours during this stage. Your lights need to be off for 12 hours per day (with the exception of autoflowers, of course). Keeping them on longer can result in your weed plants switching back to vegging and then you’ll have a hard time getting them to flower again.

During vegging, you have much more flexibility. It is perfectly possible to leave the lights on overnight, but as mentioned, it is best to give your plants at least some darkness. The most common lighting schedule during vegging is 18 hours of light and 6 hours of darkness. This is the schedule we recommend. 20 hours on and 4 hours off works well, too.

Another interesting option is to use a 6/2 light schedule. What this means is you leave the lights on for six hours, then turn them off for two. You have 3 of these cycles per day. You still end up with 18 hours of daylight and 6 hours of darkness, but they do not all fall at once.

Do Autoflowering Plants Need A Dark Period?

Yes, autoflowering marijuana plants they need time to rest, just like any other plant. Then main difference with autoflowering cannabis strains is that they switch to flowering automatically. They do not need you to shorten the daylight hours to tell them when to switch.

Theoretically, you could run the lights 24/7 even during flowering, but you shouldn’t. However, you can run them on an 18/6, or even a 20/4, cycle during the bloom stage, the same as during vegging.

Should Seedlings Get 24 Hours Of Light?

No, they should not. Seedlings also need a dark period. We recommend leaving the lights on for 16 hours a day for seedlings.

Leave Grow Lights On 24/7: Final Thoughts

Leaving your grow lights on for 24 hours a day increases the total amount of light your plants receive during the day, which leads to faster growth. But your plants will likely be weaker and more susceptible to disease.

If you want to give them more light, you should add additional grow lights or replace your existing ones with more powerful fixtures. This will give you far better results than simply leaving the lights on longer, which you won’t be able to do anyway, once you are into the flowering stage. If you want to add led grow lights, our shop will help you find the right ones. Shop