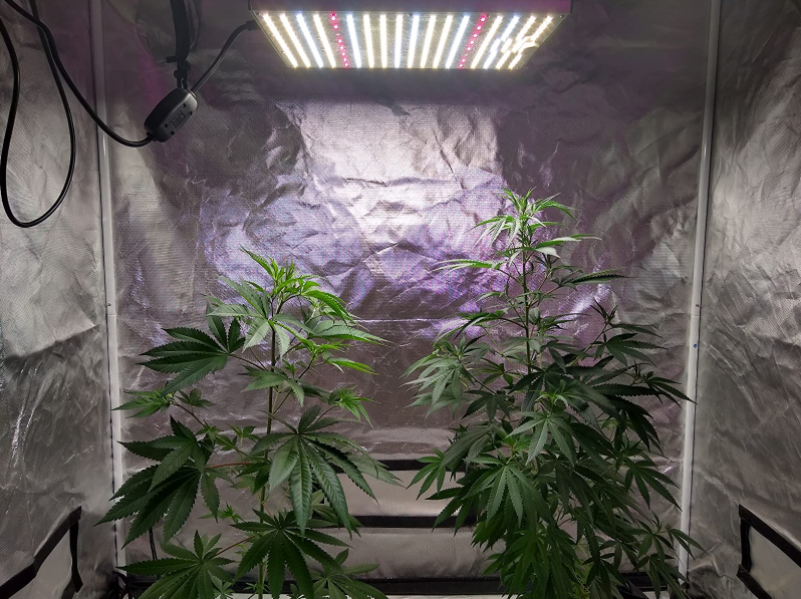
How To Make Weed Plants Grow Faster

Gardening is usually a slow, meditative, and therapeutic process. It is not a hobby that revolves around instant gratification. Long-term investment and hard work pay off months after the seeds have been sown.

However, when it comes to cultivating cannabis, some growers simply do not have the time to spare. There are several reasons for this. Some cultivate the herb on a commercial scale, so the more frequently they can harvest their crop, the faster the turnover is. Other growers, who cultivate for personal use, simply want a stash as fast as possible.

Luckily for all these groups of growers, cannabis is a versatile species that can handle a broad range of environmental conditions. Environmental factors ultimately dictate how cannabis grows, and humans have mastered agriculture to the point that we can influence growing speed; at least to a degree.

With this being said, speeding up the process can potentially harm the quality and diminish the yield of the end product. You have to ask yourself whether you want more weed or faster weed.

Grow Autoflowering Cannabis

As a general rule, autoflowering cannabis will mature at a faster rate than photoperiod strains because they contain a percentage of ruderalis genetics. Ruderalis is a species of cannabis that evolved naturally in cold places like Siberia where the summers are very short. They had to develop the ability to produce flowers and seeds quickly to ensure the survival of the species.

Most autoflowering hybrids will start to flower 2 weeks after germination and can be harvested about 7 weeks later. For example, a certain auto strain, completes its full life cycle in 8 weeks and still yields up to 150 grams per plant.

Breeders are now reducing the amount of ruderalis they use to create autoflowering hybrids in order to increase yield and potency. As a result, some may take a little longer to be harvest-ready, or require a 20/4 or 18/6 light cycle for flowering.

If you prefer to go with traditional, photoperiod strains, then make sure to choose seeds with short flowering times. Always buy seeds from reputable and established sellers who will display growing and flowering times on their websites.

Shorten The Lighting Schedule

With photoperiod strains, you can manipulate the light schedule in the flowering stage to get buds to mature faster. Although most plants will start flowering when they get less than 13 or 14 hours of light a day, it can take them a long time to “finish” and be ready to harvest with days that long.

Because of that, it is recommended to give plants 12 hours of light each day, and 12 hours of dark to get the plant to start flowering because plants usually finish maturing in about 8-12 weeks after the switch to 12/12.

However, some sativa and Haze strains are from the equator, and they may not flower properly under a 12/12 light schedule. In that case, a grower can give a plant 10 or 11 hours instead of 12 hours of light a day. This can be done to any strain and will cause the plant to finish flowering faster.

The one downside is that a shorter flowering stage with fewer hours of light each day means that buds get less time to grow in size and you will end up with smaller yields.

Therefore it is not recommended to try to get a plant to finish flowering in less than 8 weeks, as you will end up with very small yields. This technique is best used if you have a plant that has been flowering for 2-3 months and does not look like it plans on stopping any time soon.

The less light you give your plant overall during its life, and especially in the flowering stage, the less your yields will be in general. A strain that takes longer to finish flowering usually produces bigger yields than a short-flowering strain because it gets so many extra light hours where it is making energy and fattening buds.

An autoflowering plant gets a solid yield despite it going from seed to harvest in just 3 months. A big part of that is because they get 18 hours of light a day during their entire flowering period (compared to only 12 a day for regular plants). This gives the plant more light each day to produce buds, resulting in bigger yields.

Make Sure The Nutrients Are Precise

Nutrients are also key for faster cannabis cultivation. This is primarily because any deficiencies in certain nutrients will result in various symptoms that slow growth and potentially reduce yields. Cannabis plants are hungry for increased levels of nitrogen during the vegetative phase and increased levels of phosphorus and potassium during flowering.

To keep things simple, you can always purchase nutrient formulas specifically designed for both of these phases to make sure your plants get everything they need at the correct time. Moreover, you should always be diligent about checking pH to ensure your plants can uptake the nutrients they are being given.

Grow Indoors

Growing outdoors can be more convenient and vastly cheaper for those who happen to live in a place with great growing conditions since the sun and nature are doing a lot of the work for you. But outdoor growing is not the fastest way to grow and harvest your crop. Though there is an exception.

Outdoor grows must be planted in the spring and left to mature until late fall before harvesting. That means that outdoor grows can take over 6 months all in total. The upside is, given the right conditions, you can grow huge plants in that time, that produce great yields.

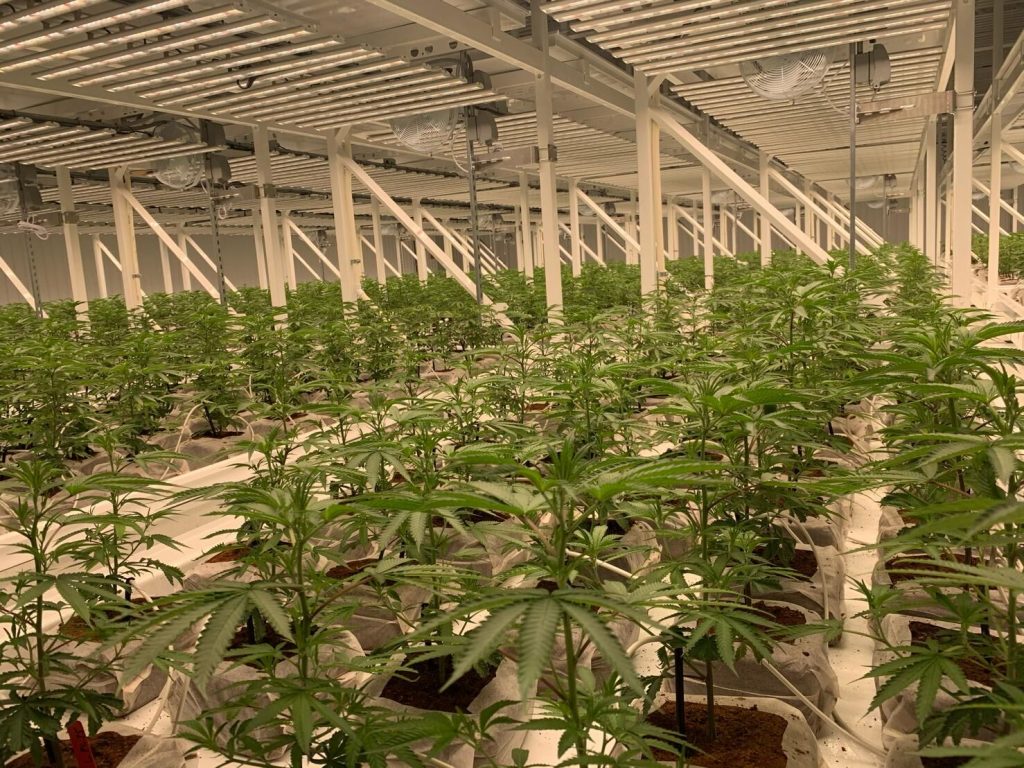
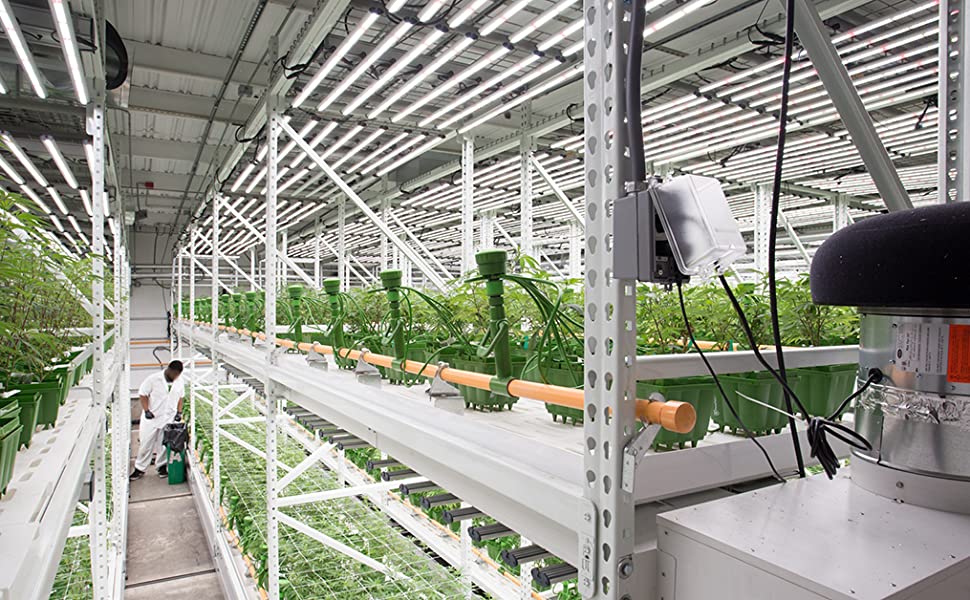
Yet growing indoors gives you the ultimate control over how big your plants get, how long to keep them in the vegetative stage, and exactly when they start flowering among other things.

When speed is the name of the game, you might want to consider hydroponics over soil. You can get faster vegetative growth with almost all hydroponic methods compared to what can be achieved with soil.

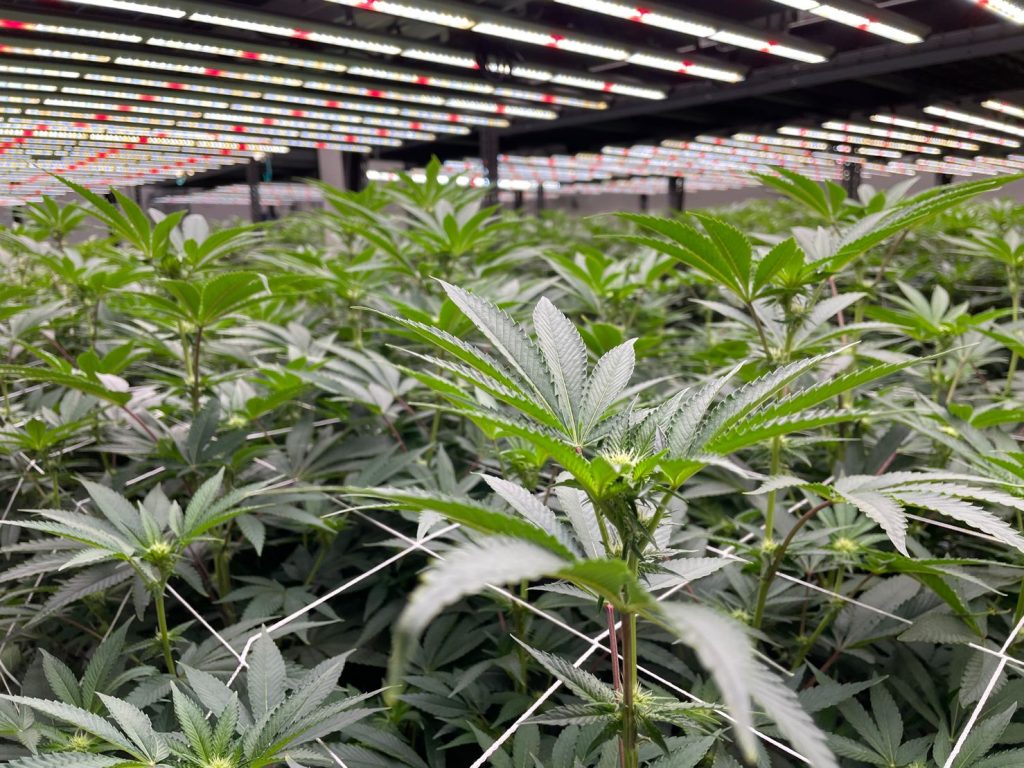
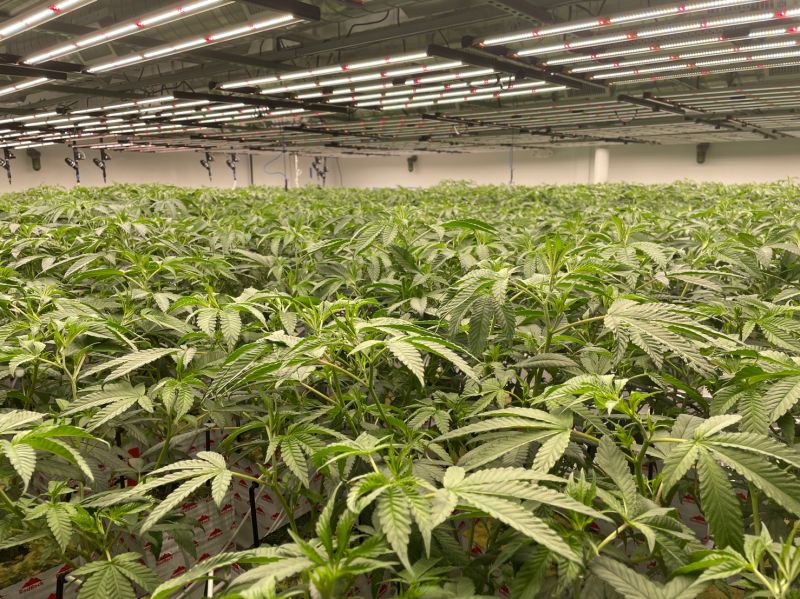
7 Advantages Of Using LED Grow Lights

Since LED lights appeared on the marketing in 1985, LED grow lights are becoming popular day by day. As a grower, it’s the wise choice to use LED grow lights. Today we will share with you the 7 advantages on the most popular and crucial LED grow light over other grow lights.

  1. Save Energy

LED lights produce the same amount of light as HPS and HID lights with lower watts. This will help growers to save electricity bills. Our Aokairuisi team has tested in the efficiency between the High Pressure Sodium (HPS) lamps and the LED lighting bulbs. The results showed that LED lights decrease energy consumption up to 50%.

Fewer Heat, More Light

LED lights convert the electricity to light directly. So LED grow lights emit far less heat than the lighting methods of other grow lights. This is very important for the plant grow. As too much heat can be damaging to the plants, and decrease their growth and lifetime.

The higher efficiency and low heat of LED grow lights caters to the plants needs for growing and blossoming.

  1. long Lifetime

The biggest advantage of LED grow lights for growers is the long lifetime of the LED bulbs. The light emitting diodes have very high efficiency and low energy use. Compared to MH and HPS bulbs, LED lights have approximately around 85 000 more hours of lifespan. This leads them to lasting up to eleven years of continuous lighting or twenty-two hours of half-time operation. Moreover, after used for more that 10 years, LED lights don’t stop working suddenly but slowly decrease in brightness. This give the grower heads up in order to prepare for change.

For an indoor environment where constant lighting is important, it is a big advantage to have long lifetime of LED bulbs. As this ensures less frequent maintenance service time and cost.

  1. Easy To Install

The LED lights are very easy to installed, especially in smaller grow rooms. The design of LED lights is “all-in-one-package” and requires for the light to be simply plugged in, hung up, and for the grower to assure airflow and stable temperatures. So growers don’t have to worry about hanging reflectors or about the grow space overheating.

  1. Controllable

Most of LED grow lights include full spectrum, dimming and scheduling control into the product technology.

Dimming Controller

The dimming controller enables the grower to customize the proportion of wavelengths transmitted to the plants. Most dimmable LED grow lights are dimmable from 1% to 100% intensity. Sometimes full intensity is not required which means that the grower may make a different combination of the lights.

Timing

Another available feature of the LED grow lights is the scheduling/timing of the lights. This allows the grower to program the spectrum and dimming schedules. So growers have a manual choice of the spectrum and intensity for each hour of the day.

  1. Recyclable

As we know, HPS and MH bulbs contain mercury and release toxic vapors when break. LED grow lights are considered the safest option among grow lights. They are not entirely metal-free, do not contain mercury and their light diodes are very small, without the risk of breaking.

  1. High IP rating (Waterproof And Dustproof)

Many LED grow lights offer the features of waterproof and dustproof. The code, expressing that, is called the Ingress-Protection code, or IP. The code IP65 stands for indicating that the product is “dust tight” (6) and can be splashed or sprayed with water. There are different types of water-proof LED lights, some less watertight than others.

  1. Lower HVAC Costs

As we know, LED lights require less amount of watts to deliver the same amount of light as other grow lights. This means that they will also have lower operating HVAC costs. According to growers, a reduction of 50% of the air conditioning costs has occurred after switching to LED grow lights. Bigger grow rooms will require less air conditioning. And smaller spaces may even consider removing the air conditioning setup entirely. Low heat of LED grow light will lead to obtaining perfect grow temperatures even without the air conditioning system.

How To Work With Insects To Grow An Amazing Garden-Part III

From previous blogs we’ve introduced some useful ways to manage the insects in your garden. There’re some more tips we would like to share with you:

Three Tips For Attracting and Promoting Beneficial Insects To Your Garden

1. Increase your plant biodiversity.  

Want to attract a ton of tomato pest insects to your garden? Plant all tomato plants.

Otherwise, learn about plant guilds and companion planting. Biodiversity of plant species encourages biodiversity at other trophic levels as well. Interplanting different species together not only makes a more visually attractive landscape, it also reduces pest and disease pressure on any one species while providing a “diversified portfolio” effect on your garden harvests.

If one thing dies, no problem – you’ll still have 20 other species of food producing plants to feed you dinner.

2. Utilize the “three flower rule.” 

As a general rule, always try to have at least three plants in bloom in your garden at all times during the warm weather growing seasons. The more the better!

This will not only attract pollinators like bees and butterflies, it will also attract predatory insects whose diets include nectar, pollen, and pest insects. This might be more difficult during fall and winter gardening, but pest insects are also far less active during those seasons.

Don’t overlook small flowers (like cilantro, yarrow, carrots, elderberry) that can produce lots of nectar in addition to larger, showier flowers like lilies or daisies that tend to produce more pollen. Different types of beneficial insects prefer different types of flowers.

3. Use no-till methods.

Imagine you and your family are sleeping peacefully in your home. You’re jolted awake by a tornado siren. Then the next thing you know you hear a loud roar and the walls and roof of your home are ripped off. Sound terrifying?

Now imagine that happening a couple times per year. Assuming you lived through it, you’d probably move out of the area fast. 

Just as a tornado, earthquake, or hurricane can do tremendous damage to human-built communities and infrastructure, so too can tilling kill many of the thousands of species of beneficial insects that live, overwinter, or lay eggs in your soil. Not to mention the damage that tillage does to all the beneficial microorganisms that work around the clock to build healthy soil.

The other reasons not to till your soil? Over time, you can wave goodbye to weeding, fertilizing, and maybe even watering–all while increasing your yields!

Knowledge is empowering: will you make it powerful? 

How cool is this: YOU have the power to make a dent in some of the world’s biggest problems.

  • Your garden or yard can help save thousands of species of native pollinators and other beneficial insects.
  • You can sequester significant amounts of greenhouse gases in your soil.
  • You can help preserve rapidly disappearing varieties of heirloom/landrace seeds.
  • You can help produce clean air and water.

What do you get in return? The ability to walk out your front door and harvest baskets full of healthy, garden-fresh organic food. Go start your organic garden today! 

How To Work With Insects To Grow An Amazing Garden-Part II

We’ve learned that the vast majority of insects are beneficial. Then do you know what are “good”, “bad” and “ugly” insects?

What are “good” insects?

“Good insects” are simply those insects that serve a beneficial role in your garden. For example:

  • pollinating crops,
  • eating other pest insects, or
  • converting inanimate plant and animal matter into bioavailable nutrients for your plants (decomposition).

Technically, that means all insects are good since they all fill an important ecological niche – otherwise, they wouldn’t continue to exist.

Take mosquitoes: there are 3,500+ species in the world, and only the females of a few hundred of those mosquito species bite or spread disease. Are mosquitoes bad? Yes.

But mosquitoes are also pollinators and an important food source for countless other creatures, plus their larvae are important aquatic decomposers. Are mosquitoes good? Yes. (We still squish them when they bite us and we also control them using safe methods in our yard.)

What are “bad” insects?

Bad insects are generally defined as those insects that:

  • can harm or kill your garden plants,
  • spread disease, and/or
  • enjoy eating the same foods that you do.

Is the beautiful little Melittia satyriniformis moth “bad”? You probably won’t want to take a selfie with one when its larvae burrow into your squash stems (yes, this is the “squash vine borer“). 

Make no mistake, there are some insects that we kill on sight when we see them in our gardens – squash vine borers (adults, eggs, or larvae) are one such creature. But rather than indiscriminately spraying our plants with poisons that kill/harm other beneficial insects, microorganisms, amphibians, reptiles, animals, and humans, we prefer to use target-specific methods of eradication or deterrence that cause little to no impact on other species in the garden ecosystem.

Ugly Insects 

Ugly insects? Nope, sing along now: “Every-one is beau-ti-fuuuul, in their own waaaay!”

Ray Stevens was clearly a huge insect fan when he wrote that song. As you start to learn and appreciate your insects, those once-ugly creatures will transform into beautiful and fascinating lifeforms right before your eyes.

How can you tell which insects are bad?

Regional Insect Variability 

The insects in your garden are very likely to be different than the insects in our garden if you live in a different region of the country.

If you’re an organic gardener, we highly encourage you to get a region-specific insect identification book. Or, find region-specific insect ID sources online.

Keep learning!

After a few years of gardening and insect ID’ing, you’ll be able to identify nearly every insect you see without looking it up. You’ll also know what role they play, and know whether they’re considered “good” or “bad.”

A Guiding Principle

Guiding principles are important.

“Primum non nocere“ (translation: “First, do no harm”) is a guiding principle in medical ethics. “Leave no trace” is a guiding ethic amongst conservationist and outdoor enthusiasts (and something you might have learned as a Boy Scout or Girl Scout when out camping in the woods).

We encourage gardeners to adopt the following guiding principle in their treatment of insects: “If you can not identify the insect or its role in your ecosystem, do it no harm.” 

Four Methods To Manage the Insects You Consider To Be Pests

If you’ve successfully identified a pest insect in your garden that has few natural predators and can significantly damage your plants, then consider using whichever of the following control methods are most appropriate for your situation:

1. Soapy water 

Take a bowl or small bucket of soapy water, grab the insect with your gloved hands, and drop it into the water.

2. Squish 

What do you do when you find a mosquito biting you? You squish it! 

As you become more comfortable with insects and you’ve been gardening for years, squishing a squash beetle with your hands won’t seem that terrible to you–just like swatting a mosquito probably seems normal to you now. Shoes work great too.

3. Pheromone traps and trap crops 

Pheromone traps can draw certain pest insects away from your plants and into a trap where you can easily dispose of them.

If you have a larger garden or farm, trap crops can be helpful. Trap crops are a companion planting method wherein you grow certain species of plants in close proximity in order to attract pest insects away from your higher value crops. A well-known example is planting mustards near strawberries to keep lygus bugs off of your strawberries.

4. Insecticidal products

Horticultural oil, neem oil, etc. There are some good, safe insecticidal products that you can buy to help with certain types of pest insects.

To be continued…

How To Work With Insects To Grow An Amazing Garden-Part I

Modern conveniences make it very easy to forget that we are all a part of nature, not apart from nature.

Sometimes that’s a good thing… Being able to use satellite technology to see a hurricane headed towards you days in advance so as to flee to a safe location is a much better alternative than clinging to the trunk of a tree through 125mph winds.

Sometimes, that disconnection is not so good, especially when combined with irrational fear. Unfortunately, it seems that many people have developed a profound dread and ignorance of all six-legged critters with an exoskeleton. (And don’t even bring up eight-legged arachnids – the horror!)

But we do ourselves — and the natural world that sustains our wellbeing — a tremendous disservice by not appreciating its systems or the parts and pieces that make it all work. Perhaps nowhere is this more obvious than in our treatment of insects.

The commercialization of fear

Go into any garden center and you’ll find a huge selection of insecticides with names that speak directly to our desire to engage in perpetual warfare with the hordes of strange and scary creatures who happen to live in our yards: Onslaught, Conquer, etc..

It seems that people have come to hate insects so much that they’d rather pay to replace them with endocrine disrupting carcinogenic chemicals in their home landscapes where their children and pets play.

This not only ignores the critical role that insects perform in maintaining life on earth as we know it, but it also ignores the reality that we’re all biological organisms, and can thus be harmed by the same poisons we use to kill the other living things we don’t like. (Infants and young children are especically susceptible to various pesticides during critical stages of development.)

Fact: The Vast Majority of Insects Are Beneficial

The standard people’s yard is a barren, chemical-soaked wasteland containing a small handful of plant species (mostly grass). 

We’d like to encourage you towards a different goal with your yard: create an ecologically regenerative landscape that produces piles of safe, healthy organic food for you and your family. 

Doing this well will require you to learn about and be comfortable with insects. Just think of them as a few hundred million extra pets that feed and walk themselves, while making food for you!

Yes, insects are responsible for pollinating a majority of the edible plants you’ll grow in your garden. And the “good” insects are responsible for keeping the “bad” ones in check. Without prey insects, there can be no predatory insects.

Are most insects helpful?

Another fact that might help you overcome your fear of insects: 95% of all insects are considered beneficials (e.g. “good” insects) or benign (“harmless”). Thus, we highly suggest you put the poison spray down and learn how to use your insects as the valuable resource that they are! 

Garden insects: the good, the bad, and the ugly

How do you know if an insect is good, bad or ugly?

Some scientists get irritated by the public’s hyper-fixation on “charismatic megafauna,” (e.g. the larger, cuter animals that make the cover of magazines) while those same concerned citizens could care less about conservation efforts for a less cuddly but equally important species like snails or pollinating insects that don’t produce honey. 

Please don’t simply think of “good or bad” in terms of whether or not you can imagine giving the creature a belly rub, robbing its honey, or taking a selfie with it. In fact, these rather simplistic and arbitrary definitions might not even make sense at all, considering that so-called “bad” insects serve important roles in their ecosystems and are also usually food for good insects, birds, and other species.

To be continued…

Is Light Necessary For Seed Germination-Part II

In the last blog, we have talked about the stages of seed germination. In today’s blog we will continue to show you more information about it:

Seed Germination Stages

3.The Light Absorption Phase:

This stage is a distinguishing phase for most plants as they have different responses to light for their germination. Some plants are photoblastic (they grow in the light), while others are non-photoblastic (they don’t need light to grow).

When seeds have absorbed water and oxygen, they tend to respond better to light, and if they are positively photoblastic, then just the right amount of light will provoke their growth. The reason for this is that these light-dependent plants contain a pigment known as phytochrome which helps with the light-absorption.

4.Utilization of the reserved nutrient during seed germination:

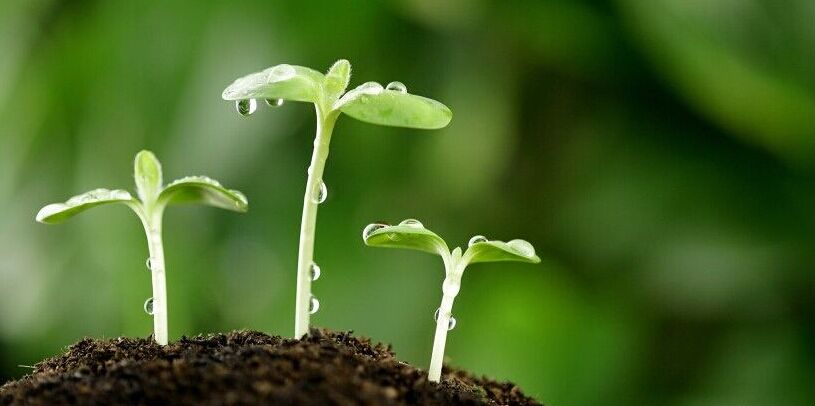
At the early stage of development, the cotyledons are responsible for storing food. When the process of germination proceeds, the stored proteins, fats, and carbohydrates are then digested to released energy for metabolism.

This energy is also required for cell divisions within the sprouting seeds via aerobic respiration.

The seedling/embryo can only absorb or digest food compounds in bits and so, enzymes help to break these nutrients down. These enzymes include proteases, amylases, etc. They make food usable and absorbable by the plants.

Other growing parts of the growing seedling get their share of the nutrients by the translocation of the soluble food materials by water. Examples of such parts are the plumule and the radicle.

5.Growth from embryo to seedling:

When food is evenly distributed throughout the plant, growth continues unhindered. Nutrients getting to the radicle makes for its rapid development into the root. It grows downwards, deep into the soil, and then starts to absorb minerals and water from it.

The next thing is the growth of the plumule. The plumule grows upwards after receiving nutrients and becomes the shoot. When it gets above the soil, it develops green leaves that eventually produce its food through photosynthesis.

What Do Seeds Need to Germinate Successfully?

For a seed to become a seedling and then a mature plant, here are the requirements needed:

1.Moisture:

You can’t talk of seed germination without talking about water. Remember that the first stage of development for any seed is the absorption of water.

Some seeds are relatively dry, and for them to begin germinating, they need to absorb much water. Water helps with the following during seed germination:

  • It helps to transport nutrient
  • It provides dissolved oxygen for the embryo
  • It makes it easy for the cotyledons to break out from the seed coat
  • It helps to sponsor metabolic activities within the seedling

2.Light:

Honestly, light is much a vital requirement for some plants as darkness is to others; it all depends on the nature of the plant in question. Light serves as an external trigger for the seed germination process, and some plants would not sprout till light shines on them. Shop

3.Temperature:

The temperature required for a seed to germinate fluctuates between 25-30°C. Not all seeds will require this temperature to grow, while others will require much more. However, the range of temperature considered to be optimal is between 5 to 40°C.

Temperature also determines the seed germination time for some plants since some seeds are planted outdoors and are left to thrive on their own.

4.Air/ Oxygen:

Oxygen is needed for energy and metabolism; it is essential for seed germination. Aerobic respiration is the primary and initial respiration mode undertaken by plants before they can eventually produce their nutrients.

The role of oxygen also determines how certain seeds are planted; when some seeds are buried too deep within the soil, they don’t thrive.

Is Light Even Necessary?

Most plants are phototropic, which means that they move in the direction of light. All plants require light to grow their root, and if they’re deprived of this, their roots become leggy due to their strain for sunlight.

There is, however, a variation in the amount of light required for each plant.

For plants that require less light during their adult life, they won’t require as much light as compared to others. When seedlings are overly exposed to heat and sunlight, they’d dry up or die.

When it comes to seed germination, some seeds need light, while others don’t. This knowledge helps us decide when to begin growing seeds indoors or even outdoors.

  • List

If you’ve thought of growing your plants indoors, then you need to be aware that plants that require light to sprout may greatly benefit from led grow lights.

Importance of Led Grow Lights for Indoor Plants

Among indoor plant growers, LED grow lights have become popular for many reasons. One of which is the numerous benefits it confers. Here are some of the benefits.

Longer Lifespan:

LED grow lights can help simulate or recreate the same atmosphere that sunlight provides for seed germination. Most LED grow lights have a longer lifespan, last long, and you can rest assured that your plants are getting quality light exposure.

Cooler Temperature:

Unlike HID bulbs, LED grow lights emit less heat and have less potential to damage your plant with extreme temperature/light.

Efficiency:

Indoor plant growers admit that LED grow lights are more efficient in their contribution to the growth process of indoor plants.

Conclusion

Seed germination is a fun process for the gardener, and having the right knowledge makes things easy. For seeds to thrive, they require optimum levels of light, temperature, moisture, etc., at the most fundamental level.

Not all seeds require light to grow, while others that do should be given the right amount of light, especially as seedlings.

It is possible to cultivate your plants indoors; LED grow lights would be of great benefit here. However, never forget that excess exposure to light and heat can dry up the plant and lead to death.

Ready to begin your seed germination process? The best time to kick-off is now.

Is Light Necessary For Seed Germination-Part I

Fundamentally, it is common knowledge that light is necessary for seed germination. Also, if you’ve tried germinating seeds indoors, you’d have observed the need for grow lights since sunlight is not available.

However, it is interesting to note that some plants do not require light for their seed-germination process.

For plants to thrive, they need three basic requirements, soil, water, and light. These elements are needed in the right amount to sponsor photosynthesis for sprouting seeds; light is sometimes not required for this process. The reason is, some plants do well in darkness than with sunlight.

This article will answer all your questions regarding the necessity of light for seed germination and much more; read till the end.

What Is Seed Germination?

By basic definition, seed germination is the process in which seeds grow into fully mature plants. What happens during this process ends up influencing both the seed quality and that of the plant.

Remember that for this to happen, some environmental factors have to trigger the event.

So, how the seed grows is affected by how you plant it, the temperature around it, humidity, and much more.

Generally, plants can be classified based on the type of germination they undergo. The classification, in this case, is based on how the cotyledons are present (the first leaf the sprouted seeds get to produce). These two types include:

  • Epigeal germination
  • Hypogeal germination

In epigeal germination, the cotyledon breaks out through the soil as a result of the elongation and rapid growth of the early part of the stem (hypocotyl). This type of germination is very common in plants like beans and castor.

While in hypogeal germination, the cotyledons remain buried within the soil as a result of the quick sprouting of the epicotyl (the part of the stem of the sprouting plant just above the cotyledon).

Let’s take a look at the seed germination stages now.

Seed Germination Stages

For a seed to properly germinate, it needs to go through this entire process:

1.The absorption stage:

This stage is also called the imbibition stage; it is where the dry seeds get to absorb water and swell. The result of this swelling causes the seed coat to break or rupture.

2.Oxygen Intake, Respiration, & Metabolic Phase:

As a result of the imbibition of water in the first stage, metabolic activity is triggered within the seed. Then, the process of aerobic respiration sets in because the seed initially does not have oxygen.

Also, at this stage of seed germination, the seed requires some level of energy to continue with the growth process. This energy comes by glycolysis.

Glycolysis is the breakdown of glucose within the plant so that there can be a release of energy for vital functions.

So, oxygen then begins to find its way into the seed, and respiration becomes aerobic. For most plants that thrive on land, the source of their oxygen is usually the air from the soil on which they are planted. The knowledge of this is what informs plowing and loosening of the soil before sowing.

For seeds that grow in water, they derive their oxygen from the dissolved oxygen in the water.

To be continued…

Why We Don’t Recommend 6/2 Light Schedule-Part II

As we discussed earlier, we’re always willing to keep an open mind. We have showed a few possible advantages in the last blog, let’s move on to the disvantage now:

Disadvantages Of A 6-2 Schedule

The primary disadvantages of this lighting schedule are increased complexity and more stress on your plants when you switch from this 6/2 vegging schedule to the flowering schedule.

More Complicated

Having your lights come on and turn off 6 times a day is more complicated than doing it only twice a day. In fact, many timers are only able to turn them on and off once per day. Even the best timer for grow lights is unlikely to have this function. Few timers would even be able to handle a 6/2 schedule.

This means you would have to get a timer that can turn the lights off and on multiple times throughout a single day. You would also have to set up everything correctly so that the lights come on and turn off when they should.

And you’ll definitely need a timer—don’t even think of running this schedule while manually turning your lights on and off.

Naturally, you may want to program your cooling equipment to run concurrently with the lights. Or to increase in output when the lights are on and run at a lower setting when they are off.

Stress When Switching To Flowering Schedule

Switching from vegging to flowering is a bit unusual with a 6/2 schedule, because the length of time the lights are on continuously increases, instead of decreasing as it usually does.

If you use the standard 18/6 lighting schedule (or 20/4 or 24/0), the daylight period gets shorter when you switch to the 12/12 flowering schedule. But when you switch from a 6/2 schedule to bloom, the continuous daylight period actually gets longer, doubling from 6 hours to 12.

Like most of the benefits of this lighting schedule listed above, this drawback is also not proven. There are simply reports from growers who have seen their plants take much more time to adjust to the bloom schedule and to enter the flowering phase of growth.

Most likely, this will not cause a huge impact, but it is worth taking into account, if you are considering the 6/2 daytime breakdown.

One thing you could do to minimize any effects is to first change to a 10/2 cycle toward the end of vegging, before flipping all the way to the bloom schedule.

This will help ease the transition and has the added benefit of giving your plants an additional 2 hours per day of daylight at a time when growth is really taking off. This means they will start growing buds sooner. 

Is It Worth Trying?

This is the big question. Is it worth trying the 6/2 vegging timetable?

The possible benefits aren’t huge, most of the benefits are anecdotal only and have not been proven, and it’s going to be more work for you. Just stick with the 18/6 timetable that is easier to implement and has been proven to work well.

It is additionally worth remembering that plants in nature also live by the 18/6 (or a similar) schedule. They get their daylight in one continuous period, not broken up into 3. Plants have evolved to work with that.

All that said, using the 6/2 schedule is unlikely to have any major negative effects and it could possibly result in some faster growth. If you’re curious and don’t mind the extra work of getting it set up and ensuring it is running properly, there is no real harm in trying.

In fact, since there are a lot of questions online about the 6/2, but there are very few actual grower reports, you could document your results and help a lot of people.

What is really needed is a direct comparison growing the same plants under the same conditions in parallel, with only the light schedule being different. That could answer the question once and for all, which one works better.

6/2 Cannabis Lighting Schedule: Final Thoughts

Running your grow lights for 6 hours at a time, followed by 2 hours of darkness, is intriguing. No doubt about that.

But overall, we don’t feel it is worth actually trying, unless you have the spare time and capacity to do it. If you’re just trying to get a grow going and get a good yield, there’s already enough to worry about. Why complicate matters further for what will, at best, result in slightly faster veg growth?

Why We Don’t Recommend 6/2 Light Schedule-Part I

We like to keep things simple. And that means sticking to tried-and-true methods. Weed that is growing outdoors enjoys long periods of daylight during vegging and around 12 hours of daylight and 12 hours of darkness during flowering.That is why indoor growers provide 18 hours of daytime during vegging and then switch to 12 hours to induce flowering.It works.

So obviously, we’re skeptical when presented with the completely different 6/2 light schedule. But we’re always willing to keep an open mind, so let’s take a closer look.

6/2 Light Schedule

A 6/2 light schedule means keeping your lights on for 6 hours at a time, then turning them off for 2 hours. You do this three times a day. This schedule is for vegging (or seedlings), but obviously not for flowering, which requires 12 hours of continuous darkness.

In terms of total amount of light, it is the same as the standard 18/6 vegging schedule (18 hours of light, followed by 6 hours of darkness). The light and darkness periods are simply broken up into 3 smaller chunks. Breaking the periods of light and darkness up like that has several advantages, though most seem to be anecdotal only. It also has some potential disadvantages.

We’ll cover them next, but overall, we conclude that you’re better off just sticking to one of the regular time schedules, like 18/6, 20/4, or leaving grow lights on 24 hours.

Advantages Of A 6-2 Lighting Schedule

Below are the three most commonly cited benefits of a 6/2 lighting schedule. Only the last one is a proven benefit, and it is one that most growers won’t really need. The other two might help a bit, but probably won’t make much of a difference to your grow overall.

Gives Plants A Rest Period

The advantage most often cited for the 6-2 schedule concerns the amount of light plants can process per day. Once a plant has reached its daily limit, it can no longer absorb any light and continuing to give it light after that point is simply a waste of resources.

Providing 2 hours of darkness after 6 hours of continuous lighting gives the plant a chance to rest and process the light it received during those six hours. When the next 6 hours of light begin, the plant is ready to process more light. In this way, you maximize growth throughout the day.

This sounds like a compelling argument, and it very well may be, but we have not found any proof of this whatsoever. In fact, we have not seen any reports of growers having issues with 18 hours of light being too long. Many even provide light 24/7 during vegging and it does not seem to have any negative effects.

Prevents Light Stress

This is another unproven advantage. After 18 hours (or more) of continuous light exposure, marijuana plants can start to show signs of stress. These include droopy leaves or leaves that curl upward and they appear near the end of the light cycle.

If you only have the grow lights on for 6 hours at a time, these symptoms of stress do not appear. It strands to reason that shorter periods of continuous light are less stressful on the plants. What is not sure is whether a little stress actually has any negative effect on the plants. Every indication is that it does not.

Gives Your Grow Tent A Chance To Cool Down

If you are having trouble keeping your grow tent cool, a 6/2 lighting schedule might be beneficial. By breaking up the 18 hours of running your lights, and giving them 2 hour breaks every 6 hours, you also give your tent 2 hours to cool down.

This means you won’t need quite as much air conditioning, ventilation, etc. You also won’t have to run those systems for 18 hours straight, which put less stress on your fans and other equipment.

To be continued…

Why Use A Grow Tent For Indoor Growing& Is It Necessary

Grow tents come in plenty of shapes and sizes. They are being marketed to indoor growers with claims ranging from “good to have” to “a necessity”. How important are they, really? Is a grow tent necessary? How does a grow tent compare to a closet? Is a grow tent only necessary for cannabis growers or can vegetable, tomato, and pepper growers also have use of it? Or is growing without a tent just as effective? Here’s our take on this matter.

We have grown plants in all kinds of places: inside grow tents, closets, garages, shelves, greenhouses, and out in the open. When growing outdoors there’s obviously no point in using a grow tent as it would block sunlight. But indoors and when using artificial lights it’s a different story. Grow tents have several benefits for indoor gardening:

Pros with using a grow tent:
– Contains light within the tent
– Reflects light from its inner walls onto plants
– Contains smell (somewhat)
– Makes it easier to regulate temperature and humidity
– Durable and reusable for many, many years
– Easy assemble, disassemble, and store

Cons with using a grow tent:
– Bulky, occupies space
– Comes with an upfront cost

Alternatives to a grow tent:
– White walls
– Mylar bits
– Aluminium foil

In our opinion, the pros outweigh the cons. This is especially true if the indoor grow is in an open space, a living room, for example. Grow lights typically emit a lot of light with high intensity and if spending significant time in the same space as the grow light, its emitted light will be a distraction.
A tent will also contain the smell of plants and with a carbon filter and controlled ventilation there’s minimal smell leakage. For tomatoes this is not an issue but when growing marijuana, the smell can be overwhelming or even an issue. Grow tents are not 100% airtight but they still contain smell, humidity and temperature fairly well. Tents have a large zip door and two smaller holes, one at the bottom and one at the top, for air circulation so its inner environment can be regulated.

Our biggest reason for using a grow tent is, however, because of its reflective surface. As the light emitted from any light source will flow over a large area, a lot of it would go wasted without a tent. As indoor growers, we want as much as possible of the emitted light from a grow lamp to land on our plants. After all, it is light that drives photosynthesis. The more light we focus on our plants the quicker they will grow.

With that said, there are other ways to reflect light. White painted walls in a closet work nearly as good as the reflective mylar walls of a grow tent. Mylar walls reflect about 90-97% light while white walls reflect around 70-90%.
Buying a roll of mylar instead of a grow tent is also an option. Wrap the roll around your plants or cut out pieces and fix them to a frame to build your own DIY grow tent.
As a last resort, aluminium foil also has good reflective properties. In a pinch or on a budget, this is a decent substitute.
Keep in mind though that a reflective surface should be as straight (not wrinkly) as possible. Wrinkles reflect light at an angle and the photons might scatter if the reflective material is noticeably wrinkly or uneven.

Hope this helps and happy growing! View some nice grow lights here: Shop