Grow Better Tomatoes with Full-spectrum LED Grow Lights

Growing Tomatoes Indoors

Growing vegetables all year long can be quite a challenge, especially if you live in an area that doesn’t have “Summer” all the time. For hobbyist tomato farmers and commercial tomato growers, lighting is one of the main components.

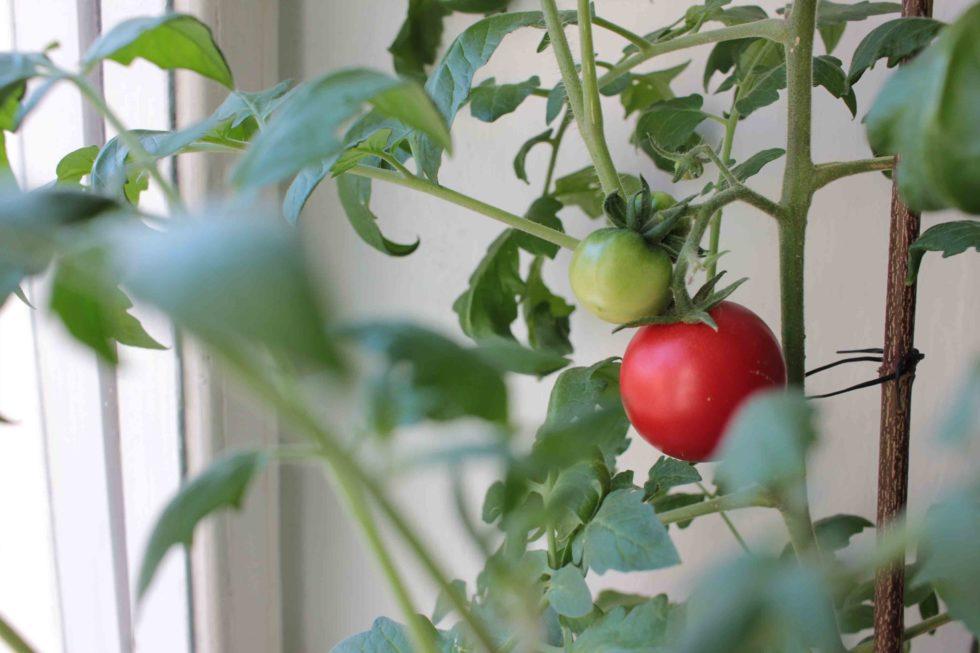
Tomatoes need at least 6 to 8 hours of sunlight a day. This sunlight can be natural or artificial. In most locales, artificial lighting will be necessary to meet the 8 hours of daylight for tomatoes to be grown year-round.

Not all artificial light is created equal

Fluorescent – less expensive, at least initially.
These types of grow lights are generally less costly than other types. However, fluorescent light fixtures don’t provide the sun-replicating full spectrum light needed for tomato plants. Not only will this choice of fixture yield fewer tomatoes, but it will also consume more energy and investment when the bulbs need replacing.
 
HID (high-intensity discharge) – better yield than fluorescent but energy-hungry heat machines.
There are two subcategories in the HID grow light (HPS – high-pressure sodium; MH – metal halide), and because they provide only one color in the spectrum, both kinds are required at different stages of a plant’s growth cycle.  Switching requires a redundant set of fixtures or changing the bulbs when the crop enters a new growth stage. These lights are powerful and require specific rigging and fixtures. HID bulbs need replacing more frequently, which adds to the overall cost. 
 
LED Grow Lights – worth the investment.
LED grow lights are more cost-efficient in the long run since they use the least amount of electricity. Because they don’t burn a gas to create heat, they are much cooler than fluorescent or HID. The light wavelengths are fuller and contain both red and blue lights, yielding more tomatoes per plant. These fixtures utilize light emitting diodes and require little to no maintenance over the course of a long service life.


LED Grow Lights – looking deeper

LED Grow lights with higher color temperatures (5000-6500K) provide the full light spectrum and promote all vegetative growth stages. Grow lights with lower color temperatures (2500-3000K) encourage flowering and are often used when the plant develops fruit. Tomatoes need both red and blue light to grow and produce fruit.
Blue Spectrum Light 
Blue light is vital for the vegetative phase of the tomato plants, during which they grow their leaves and stems. It also increases the mass and yield of tomato plants, but excess blue light causes the plant to be counterproductive. Tomato plants grown exclusively under blue light causes a reduction in photosynthesis.
 
Red Spectrum Light
Tomatoes need more red light than blue light. Red light is used more efficiently by tomato plants, and they need a large quantity of it during the flowering growth period. Tomatoes depend on the red light for the amount and quality of their flowers. Red light instills tomato plants to become more resistant to disease and environmental stress.
 
When growing tomatoes under full-spectrum lighting, make sure the red-light ratio is higher than the blue light. Remember that the “full-spectrum” of lighting mimics the sun’s natural lighting, and healthy tomatoes need the full artificial spectrum of light.

Guide to Indoor Strawberry Cultivation

Greenhouse Strawberry Production Recommendations 

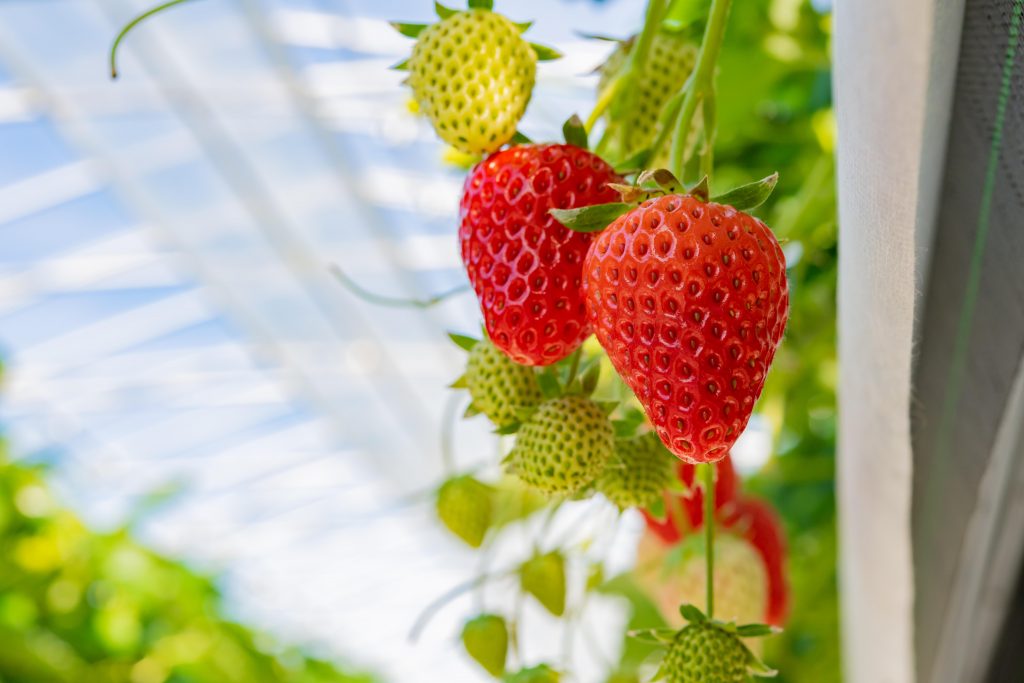
Consumers are demanding more local, year-round greenhouse grown berries, and growers have been quick to answer with increasing strawberry production in controlled environments.  Strawberries can be complex to grow, but there are species that are well suited to indoor growing environments. Since greenhouse strawberries are grown in off-season, low light months (September-April), supplemental lighting is an important way to achieve consistent light levels for maximum production.   Greenhouses can also offer a better growing environment in terms of controlling light, temperature, CO2 and other environmental parameters.   

In this article, we cover the basics behind greenhouse strawberry production, and how supplemental lighting will be important for achieving optimal DLI (daily light integral) levels when natural light is low, as well as its importance for flower induction.  Our research comes from firsthand experience having worked with some the largest greenhouse strawberry producers in North America, as well as leading-edge research in controlled environment strawberry production. 

Strawberry Cultivars

There are two kinds of strawberry cultivars, June-bearing and ever-bearing.   

Junebearing cultivars have a critical photoperiod and are short-day flowering plants.  Flowering is initiated under daylengths of 8-13 hours and under cool temperatures.  If day length or temperatures exceed the maximum, flower initiation stops.   

Everbearing cultivars are known as facultative long day plants, and develop more flowers under long days, but will develop flowers regardless of daylength.  Flowering can be initiated with supplemental lighting or night interruption lighting.  Flowering is also affected by temperature, and will be suppressed if it exceeds 30 degrees Celsius.  For most growers, ever-bearing varieties will make the most sense for greenhouse production.   

Light Recommendations 

Strawberries can produce fruit under low light levels, but it’s not optimal for high yield, high productivity greenhouses.  DLI, which measures the amount of light received over a 24-hour period (measured in moles per meter squared per day), is a good way to guarantee your plants are receiving the recommended amount of light for achieving high productivity and yields.   

It is recommended that growers target a minimum DLI of 12 mol/day, however for optimal productivity, it is recommended to target a DLI between 20-25 mol/day.  Going above this limit can stress strawberry plants and productivity will be reduced.  There has been research to suggest that strawberries show a steep diurnal decline of net photosynthesis, and that the morning hours are critical for promoting photosynthesis.  

Temperature Recommendations 

Managing temperature is important for controlling flowering of strawberry plants.  Literature recommends keeping daytime temperatures between 68°F-75°F (20-24°C), exceeding this range may limit flower initiation and stress plants. Strawberry plants require lower nighttime temperatures to produce high quality fruit.  In general, fruit size increases at lower temperatures, and sugars and flavour also improve when plants are grown at low night temperatures, between 50°F-54°F (10-12°C).  

Humidity Management

Strawberry plants tend to be sensitive to humidity.  In dry environments, low humidity may become an issue and cause the physiological disorder tip burn/calyx.   Tip burn is a calcium deficiency in the leaves and is caused when plants are transpiring a lot, and the calcium is going mostly to the leaves and not to the developing tips/shoots.  

Research suggests that implementing a minimum 3 hours of high humidity at night, around 90-95%, is needed to avoid tip burn.  This helps to slow down transpiration rates and allows calcium to reach the growing tips.  After this high humidity period, humidity should be lowered to dry plants out and help prevent foliar diseases.    Daytime humidity levels should be between 40-60%.   

CO2 

CO2 enrichment is useful for enhancing photosynthesis when light levels are low and when vents are closed, which is usually in the winter months.  Since CO2 can drastically fall during these times, supplementing with CO2 (with concentrations around 1000-1500ppm), can be useful for increasing yields and overall plant productivity.   

What kind of lighting should I use? 

LED luminaires could be a great option for strawberry production. Because of their low heat load and more targeted spectrums, they’re good for growing strawberries, we have seen great success with using LED luminaries for strawberries production. If you’d like to order a sample to test, please contact us by email: hi@ledgrowlight.co

Are All LED Luminaires Created Equal?

With a flood of LED lighting products now on the market, it can be hard to distinguish what makes for a high quality, dependable horticultural LED system that gets you the results that you are looking for. Unfortunately, not all LED luminaires are created equal, and there are a few things a grower should be on the look for when researching LED luminaire manufacturers.  Doing your due diligence before committing to a lighting installation can save you headaches and money in the long run.  We have worked with countless growers who have installed cheap, inferior-quality lights that begin failing soon after installation.  Aokairuisi Grow Team has been manufacturing lighting systems for 11 years – so you know we are dependable and that our products are built to last.  There are many reasons growers want to invest in LED lighting―including increased light and energy efficiency, lower heat loads, improving plant morphology and dimming and daisy–chaining capabilities.  Let’s take a look at the big picture, so you will know what to look for when purchasing LED luminaires and some of the hidden costs that can sometimes be associated with LED installations.   

1. Is the Luminaire Certified? 

One of the first things you should be doing, is checking to ensure that the luminaires you are purchasing are safety certified.  You should check for UL certification . All reputable horticultural LED lighting companies will have their products rated by recognized bodies for both safety and energy efficiency.  ( Aokairuisi LED grow lights are UL, CE and RoHS approved )

What is UL certification?  If a product comes with a UL sticker, it signifies that it has passed specific safety requirements for use in the intended application. These standards ensure that products have been rigorously tested to ensure they don’t pose a safety hazard. If a product is  UL listed, it is deemed safe for use when installed in accordance with electrical code requirements.  If a luminaire does not have UL certification, it would be wise to consider an alternate luminaire, from a reputable manufacturer, that is certified. 

2. Energy costs 

LED luminaires use far less energy than traditional horticultural lighting, up to 43% less than an HPS luminaires, making them an easy choice for growers who may be limited by power consumption or are looking to save money on energy costs. One thing to remember though, is that if you grow heat loving crop such as tomatoes or cannabis, you will need to add extra heat in the winter months to make up for the lack of radiant heat from the luminaires.  This is because LEDs do not have the ability to produce radiant heat like HPS luminaires, and this can mean supplementing with extra heat from natural gas or electricity in the cold months.   

Lighting with HPS luminaires offers the advantage of producing radiant heat which helps to offset the cost of heating the greenhouse, and can mean energy savings for cold climate growers. In addition, the plants benefit greatly from radiant heat since it directly affects leaf temperature.   

However, in cases where the crop requires cool temperatures, such a leafy greens or microgreens, LEDs might be better suited to their growing needs because they keep the crop cooler. Ultimately, a grower should consider all the factors before deciding on one technology vs. another for their application. It is critical that one weighs the initial incremental capex costs (including labour and any additional infrastructure like extra track or wiring) vs. the overall impact on annual energy consumption when calculating the ROI.  

Another option that growers should consider is a hybrid installation (combination of LED & HID luminaires) which provides the flexibility to take advantage of the radiant heat from the HID lighting, but also to extend the supplemental lighting period longer into the spring by using the LED lights only when outside temperatures and daylight hours increase. A hybrid system also reduces the initial capex and can allow a grower to further manage costs by maintaining their existing infrastructure. 

3. Are the LEDs actually made for plants? 

Some lighting companies who produce and sell lighting for homes, office, or other business applications have also tried to capture the horticultural market by claiming to produce horticultural lighting.  Many of these companies sell horticultural lighting at cheaper prices because they have been built with cheap parts and LED diodes not made for plant growth.  In fact, we often come into many greenhouses/warehouses who have bought cheap lighting products that fail or don’t produce results.  

So before investing money into a lighting system, be certain that the light emitted is in the PAR range. You can get datasheet from the company which you want to buy grow lights and do some background research, see if they’re experienced and professional and get other growers’ opinions on the products.   

11 Cannabis Growing Tips You Need to Try in 2022-Part II

Getting better buds with less light, cutting back on fertilizer, picking the grow medium that is right for you, and adopting drought stress to boost potency of your plants are some of the wonderful growing tips. Now we have more tips coming! Keep reading:

Choose Your Strain Wisely

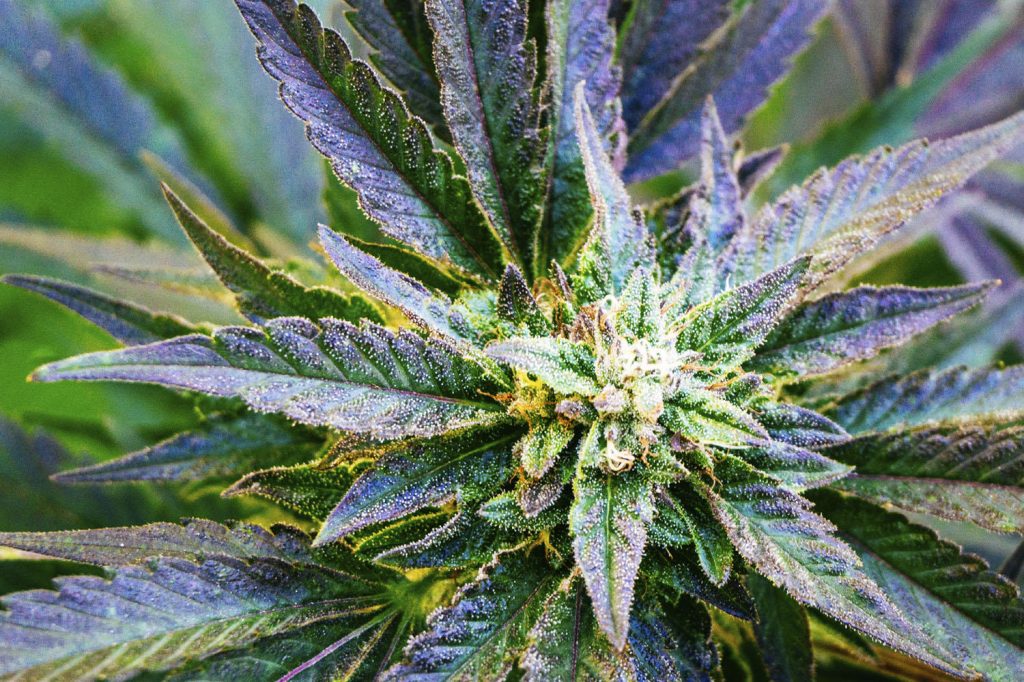
Perhaps one of the most valuable cannabis growing tips is to keep in mind that not all cannabis plants are created equal. You need to think carefully about the type of plant you want before you begin planting. For instance, some strains produce purple buds, while other strains give you bright green buds. Similarly, some plants mature quickly while others take longer. 

Cannabis strains also vary in terms of the size of the plants, the concentration of different compounds (CBN, THC, etc.), the aroma of the buds, as well as the effects one experiences after consuming them. It’s important to remember that resistance to adverse conditions, such as pests and diseases, overfeeding, underfeeding, extreme heat or cold, and even over-enthusiastic training, also varies from one strain to another.

This is why it is vital to do your homework when it comes to the different strains available and pick the strain that is best suited to your needs.

Harvest and Post-Harvest Handling is Critical!

What you do at harvest time and beyond can make or break your cannabis crop!

First and foremost, don’t harvest too early or too late. So, how do you know when is the right time to harvest? The clue lies on your buds.

If your buds aren’t “sprouting” any new white hairs, this means harvest time is close. Closely observe the hairs on the buds and begin harvesting when approximately half of those hairs have become dark in appearance. This dark color lets you know that the compounds in the buds have reached their highest level of concentration, so any delay will cause them to start dwindling.

After harvesting, take the time to dry those buds in a dark, well-ventilated location. Hang them upside down when drying them. You will know that they have dried if the stems snap rather than bend when you manipulate them.

Drying the buds is of course only half the work. Even more moisture is hidden inside those buds. This is where the curing process comes in.

Place the buds in dark containers and seal them, only opening the container once a day for about a minute to allow dry air to get in while moist air is expelled.

How long should curing last? Why not try some when you are opening the containers to let dry air in. Is there mold on the buds? If not, good! No condensation on the container’s walls? Good! Is the taste and smell satisfactory when you smoke a sample? Good! At this point, stop curing the buds and seal them tightly until you are ready to start smoking them. The curing process can last three weeks or longer.

Airflow, Airflow, and More Airflow!

It is critical to ventilate the grow space adequately. This piece of advice is so important that it should be included under cannabis growing rules instead of cannabis growing tips. Adequate airflow can prevent mold from growing on the buds. It can also prevent nutrient burn, because when where you are growing gets very hot, the plants “drink” more water to combat the heat. 

As they take more water, they absorb nutrients as well, increasing the risk for nutrient burn. Spider mites, fungus, gnats, and other pests also thrive in places with insufficient airflow. As you can see, many of the problems that cannabis growers face can be sidestepped if the grow spaces are adequately ventilated for proper airflow. 

Question All Cannabis Growing Tips

Many inexperienced cannabis growers tend to implement all the advice that they are given without pausing to digest the applicability and validity of said advice. Novice growers can be forgiven for this since they believe that they are getting sound advice from people who have more experience and are therefore better placed to know what should be done in each situation.

However, not all the advice you receive will be suitable or even applicable in your specific circumstances. Consider the following example:

Underfeeding your plants causes their leaves to become yellow at the tips before they turn brown. Unfortunately, overfeeding plants may produce a similar outcome. If you talk to someone whose plants were overfed and they showed signs of nutrient burn, they may advise that you cut back on the nutrients you’re giving your plants, yet the problem may actually be underfeeding!

Do you see how applying advice blindly can lead you down a dark alley? Learn to question all advice you receive, and only apply it after cross checking and confirming that it holds true in your situation.

Take Pictures and Write Detailed Notes

One of the most essential cannabis growing tips, especially for beginners, is documenting every stage of your plants’ growth. Take numerous photos and write detailed notes in a journal. This is especially important when you notice problems in your plants.

Those notes and pictures will come in handy as you look for help in dealing with the problem, and they will be a point of reference during future grows. This record will quickly alert you about a developing problem and the proper solution, instead of starting all over again on the next plant. 

Don’t think for a minute that your memory will suffice! Misremembering even the most minute detail can be the undoing of your crop.

Always Monitor the pH and Unlock the Missing Link

Have you done everything possible, yet the buds you harvest are nothing to write home about? The pH of the moisture in your growing medium may be the silent culprit denying you a rich harvest.

The pH of your soil can make some nutrients unavailable to the roots of your plants, even if those nutrients are available in the medium. Find out what the ideal pH range for the specific medium you are using is and check whether yours has gone out of that range. Adjust accordingly, and your plants will thrive once more!

Don’t Shock Your Plants 

One of the most fundamental of all cannabis growing tips is to be gentle with your plants. Avoid doing anything that will shock them. For example, don’t suddenly change from providing 18 hours of light to 12 hours of light. Increase the hours of darkness gradually until you reach your desired light schedule.

Similarly, when it is time to switch to the nutrients for the flowering stage, don’t stop providing those for vegetative growth one day and use only those for flowering on the next day. This abrupt change will shock your plants and decrease your growth rate.

It is better to introduce any change to your plants gradually so that they can adjust appropriately without any decline in their growth.

Growing cannabis is easy and fun, and with a little know-how your plants can yield an impressive bounty. If you’ve grown before, which of these cannabis growing tips have saved you from a ruined harvest? If you are just beginning, which do you intend to try? 

11 Cannabis Growing Tips You Need to Try in 2022-Part I

For newcomers, growing cannabis can seem very overwhelming, especially when one has so much information at their disposal. We’re sure there is nothing you would love more than to have all of these tips at your disposal. You’re in luck! Here are 11 cannabis growing tips that you must try in 2022!

Get Better Buds with Less Light

When you’re first growing cannabis, you’ll be prone to making some mistakes. This happens to the best of us. The most common mistakes among beginners often have to do with lighting. This is especially true when growing your plants indoors. 

When your plants are in the vegetative stage, you should leave them in as much as 18-22 hours per day. During this time, your plants will experience a great deal of growth and progress. Once your plants move on to the flowering stage, you can see why it would be tempting to do the same. This is where most newer growers stumble. When your photo-flowering plants reach the flowering stage, you should actually decrease the amount of light your plants receive down to 12 hours per day.

Why is this, you might ask? Contrary to what you might believe, plant growth in this stage is triggered by darkness, rather than light. Keeping your photo-flowering plants in constant light will keep them in the vegetative stage.

When you grow cannabis outdoors, the seasons will naturally regulate this light and dark requirement. However, you can also place your plant in darkness to help your plants out. 

Cut Back on Fertilizer

Another one of a few crucial cannabis growing tips concerns fertilizers. When your plants reach the growing stage, cut back on the nutrients. Again, this might seem contrary to what you have been brought up to believe about plant cultivation. After all, shouldn’t more nutrients be a better thing?

To help you make sense of this, think about multivitamins. When you take a multivitamin, does it make sense to take twice or three times the recommended daily amount? No, of course, it doesn’t! You could make yourself very sick.

The truth is, cannabis requires minimal nutrients to survive. Give them just enough to prevent vitamin deficiencies, and the plants take care of themselves! Why did you think cannabis was called “weed” anyway?

Excessive nutrients can trigger what is called “nutrient burn”, which starts at the tip of the leaves and will slowly spread if the condition is unaddressed. Leaves that have nutrient burn are unable to create and store energy for the plant, which will, of course, lessen your yield, and no one wants that!

Another side effect of giving your plants too many nutrients is that they will have a noticeable chemical taste and/or smell, as well as a lower THC content.

A good rule of thumb is to give your plants half the daily recommended amount of nutrients and only amp it up once your plants exhibit signs of nutrient deficiency. Remember the saying, “less is more”? This especially applies to cannabis nutrients.

Pick the Growing Medium that is Right for You!

Perhaps one of the most important cannabis growing tips is to select the right growing medium for your plants. Cannabis plants perform best when they are planted in something that doesn’t retain too much moisture after watering. For example, using a sandy soil that stays drier will give you a better yield than clay soil which retains most of the moisture provided during watering.

Choosing the correct medium can make or break your cannabis crops by determining how much or how little a yield your plants give. Picking the correct soil does not need to be risky.

Drought Stress Boosts Potency of your Plants

Here is a growing tip straight from the experts! Drought stress can boost the potency of your plants. No, seriously! Allowing the leaves of your plants to wilt just a bit due to insufficient moisture will cause them to curl at the ends and not stand up straight, which is when you would water them just enough to revive the leaves. 

If you keep up this drought stress during the entire flowering stage, the harvest you obtain will be more potent than from plants that were watered liberally. This is because THC and other compounds will become more concentrated in the buds of the plants which are watered sparingly. 

Think of it like this: take strawberries picked from a plant that is watered heavily daily and compare their taste to sparsely watered strawberries. The berries from the second plant will taste better! 

To be continued…

Can You Grow Cannabis Around Pets?

Pets are some of life’s greatest pleasures. There is nothing like coming home to your furry friend, seeing a wagging tail or hearing a soothing purr and cuddling up with some unconditional love. 

Then again, pets also tend to be small, uncontrollable terrors. Every pet owner has stepped through their front door to find something broken to bits, something gnawed on or dug up, something covered in some gross bodily fluid. That’s why most pet owners know to keep their homes pet-friendly, without foods, plants or décor that could harm their fur-babies or in turn be harmed by improper pet behavior.

But — what about weed? Most states that have legalized recreational marijuana usage have also permitted users to cultivate a small number of cannabis plants per household. Is it safe for you, as a pet owner, to grow marijuana around your pets, and how can you keep both pets and  cannabis crops happy and healthy?

Pets and marijuana shouldn’t mix — period. Unfortunately, pets can devastate even the healthiest cannabis crops, but worse, marijuana can poison your pets, leaving them impaired or even killing them. It is important to know exactly what can happen to each party, so you can intervene and save your weed and your furry friends.

The Worst That Could Happen to Your Cannabis

Trampled. If you keep your cannabis crop outside in your garden, you might notice your pets frolicking through the plants with glee. While this might be cute, it has a negative impact on the health of your marijuana plants. Too much foot traffic around your plants can compact the soil, making it more difficult for the roots to receive nutrients. Additionally, pets can crush the plants themselves during play, which will surely kill your crop.

Chewed. Cats and dogs are carnivores, meaning they must have an abundance of meat in their diet to survive. Even so, in the wild, both cats and dogs tend to nibble on plants to gain supplementary nutrition. Inside the home, pets might chew on houseplants because they like the taste or simply because they are bored. Small munching on a marijuana plant could stunt its growth, slowing your access to the delectable buds, but severe chewing could kill the plant entirely.

Dug. Digging is an instinctive behavior in both cats and dogs. Pets can dig to hide their waste, but they might also dig for fun or to satisfy a prey drive. In any case, digging around your marijuana plants isn’t good. Your cannabis crop needs plenty of soil around its roots to prevent those roots from drying out, breaking or rotting. Digging behaviors can also fully uproot a plant, and replanting is a difficult and risky process that will likely result in your plant’s death.

Burnt. Worst of all, your pets might find your marijuana crop to be the best place to answer the call of nature. Though some animal manure is good for plants, both dogs and cats have high-protein diets that result in solid waste that is extremely high in phosphorus. Though small amounts of phosphorus can encourage your plants to develop strong leafy growth, too much will interfere with your cannabis’s ability to absorb nutrients. Pet urine causes a similar problem with an overabundance of nitrogen. Plants burned in this way will become weak and struggle to recover.

The Worst That Could Happen to Your Pets

High. Cats and dogs experience the effects of THC just like people do, which means your pets will get high if they inhale or ingest activated marijuana, which doesn’t include leaves or trimmed cannabis. However, this doesn’t mean you should give your furry friend an edible. Because pets don’t understand why it is happening, cats and dogs can become frightened, erratic and violent while they are high. It almost certainly isn’t a pleasant experience for them.

Poisoned. Because cats and dogs are smaller than humans, they need much less THC to become high — and they can overdose on THC much easier. Marijuana poisoning, or overdosing, manifests in different ways. You should be on the lookout for extreme lethargy, difficulty walking, frequent vomiting or incontinence and seizures as well as signs of agitation, like whining, trembling or pacing. Pet experiencing marijuana poisoning should be taken to a veterinarian immediately.

Killed. When pets consume too much cannabis, they die. THC affects blood pressure, heart rate and respiration, and too much can cause a pet to slip into a coma. Fortunately, death from a THC overdose is rare, even in pets; unfortunately, pets can die from other circumstances, like choking on their vomit. What’s more, high animals might make life-threatening mistakes, like falling into a pool or off a second-story landing. 

Marijuana is incredibly dangerous to pets, so it is best to…

Keep Plants and Pets Separate

Again, pets won’t get sick from nibbling on your cannabis crop — THC requires decarboxylation to become psychoactive, which essentially means you need to heat it up before it can make you (or your pets) high. Even so, you don’t want to risk your weed garden around your pets.

If possible, you should train your furry friends to stay far away from your cannabis crop, but an even better and more secure solution is to put a physical barrier between your plants and your pets. If you grow your marijuana indoors, you should keep them in a room with a door, which you can close against your pets. You could also easily hang one of pot growing kits from the ceiling to keep your marijuana plants off the ground and less accessible. Then again, if you grow your crop outside, you should install a fence around the perimeter of your garden and perhaps add netting around your plants, to keep out all manner of pests.

You can’t live without your pets, but you shouldn’t have to make the choice between having pets and growing weed. By taking some simple measures, you should be able to enjoy the benefits of both while keeping them safe from one another.

5 Secrets To Controlling Heat Indoors-Part IV

From previous blogs, to control the heat in the grow room, we can: 1) Use supplements that protect your plants from heat damage; 2) Environment hacks; 3) Optimize your plant grow light. What is more? Keep reading this blog:

4.) Change Your Light Schedule

Opt for 18/6 Light Schedule in the Vegetative Stage

Many growers give their plants 24 hours of light a day in the vegetative stage to produce the fastest growth. Yet turning the grow light off for several hours each day helps keep the temperature down. The 18/6 light schedule is suitable for all plants in the vegetative stage, and for auto-flowering strains from seed to harvest.

Side Note: Although plants do grow faster if they’re getting 24 hours of light a day, you get diminishing returns after 18 hours of light a day. Cannabis plants benefit from having a night stage, and that helps make up for the lack of extra light. The difference in growth between 18/6 and 24/0 isn’t very noticeable (the increase in growth may not justify the extra electricity and heat).

Set Your Dark Period for the Hottest Part of the Day

This is a super simple solution to help control the heat for growers who get high temperatures in the middle of the day. User your timer to set your “Off” time to happen during the hottest hours of the day and you’re done. As long as you make sure plants don’t get light during their dark period, they won’t realize their “day” is during your night.

5.) Start with a Heat-Resistant Strain

Some strains are inherently more resistant to heat than others. For example, strains that originated from the equatorial region, including many Sativa and Haze strains, can resist much higher temperatures than strains that originated in colder regions, such as many Indica strains.

  • Tall strains with thin leaves tend to be relatively heat-resistant
  • Short, bushy strains with fat leaves tend to be more sensitive to heat
  • Check the strain description to see if it mentions anything about temperature

Here are some strains that are heat resistant, easy to grow, and produce great effects.

Photoperiod (Traditional) Strains

White Widow

  • Legendary strain
  • Buds produce smooth relaxing effects that are great for enjoying with friends
  • Overall easy-to-grow and resistant to heat and mold
  • Has a surprisingly short flowering stage (8-9 weeks) for a Sativa-dominant strain, and doesn’t get too tall
  • Great yields even if you mess up a little

In conclusion, the heat problem in the grow room is not unsolvable , although growers will encounter various problems during indoor growing, it is always worth paying, and you will get much more in return than you pay. Happy Growing!

5 Secrets To Controlling Heat Indoors-Part III

As indoor growers know, it’s crucial to control the heat in your garden, otherwise your plants will suffer heat stress. Grow light plays an important role in grow room, we can improve indoor overheating problem by optimizing the grow light:

3.) Optimize Your Grow Light 

There are several ways you can optimize your grow lights, up to and including upgrading to better ones.

Get the Right Size Grow Light (doesn’t necessarily mean lower yields!)

Grow lights that are optimized for your size grow space tend to reduce problems with heat. Too much heat hurts yields by making plants grow poorly. On top of that, too much light (light stress) can prevent buds from fattening and make plants more sensitive to heat.  That means having the right size light for your space will help prevent the space from overheating. When buying a grow light, many manufacturers list which size space the particular grow light is optimized for (aka 1’x2′ or 4’x4′). Try to match the right size grow light to your space.

In some cases, getting a smaller light can actually increase yields, especially if the heat is out of control with your current light.

 If you’re struggling with heat and plants are constantly heat stressed, consider stepping down a size.

Use an LED Grow Light

When it comes to heat control, LEDs are hands-down the best cannabis grow light. If you have tried LEDs in the past and been disappointed, we feel your pain. A decade ago, the LEDs at the time were not great for growing cannabis.

However, as of 2022, multiple newer LED grow lights have proven to be incredible at growing cannabis. These modern LEDs have been developed using real cannabis plants and live up to the LED hype, producing amazing yields and beautiful bud quality.

In our experience, nearly all newer LEDs run cooler per watt than other grow lights like HPS, LEC, or even CFLs/T5s. On top of the fact that LEDs produce less heat compared to other lights, cannabis plants under LEDs typically can stand higher temperatures. So LEDs give you a light that puts off less heat and plants that can stand more heat. If heat is a concern, you want to go with LEDs.

There are a lot of LEDs to choose from and the sheer number of options can be overwhelming. If you’re interested in getting your first LED and aren’t sure which one to get, Aokairuisi LEDs are a good mix of quality and price. They get a good rate of growth in the vegetative stage and better yields/bud quality than many LEDs in the same price range. Some good lights: Shop

Reduce Power

Many LEDs and other types of grow lights are “dimmable” which means they have different power settings that allow you to reduce the power of your light. For example, you might be able to set your grow light to 75% or 50% power. In these modes, your grow light will use less power and give off less light/heat. If there’s a heat wave coming up, it might be helpful to turn down the power until things cool down.

Raise Grow Lights

Raising your lights tends to help bring down the temperature experienced by the plants. Getting a lot of light can make plants more likely to suffer from heat, so another bonus of moving your lights further away can help them be more heat-resistant.

Note: If we need to raise my grow light higher than the normal hanger allows, we use zip ties to attach the grow light to the top of the tent. However, make sure to leave at least a little air gap so you don’t have a hot lamp touching the top surface of the tent directly (this can be a fire hazard).

Raise grow lights (if possible) when the plants are getting too hot to help reduce the heat they experience and especially reduce heat on developing buds. Sometimes a few inches can make a difference.

To be continued…

5 Secrets To Controlling Heat Indoors-Part II

Heat control in grow room is an important aspect to take care of your cannabis plants. Like we discussed in the last blog, we can apply the supplements which can protect against heat damage. Would like to find out more? Keep reading:

2.) Environment Hacks

Add CO2 to the Air

Plants can easily survive in temps up to 95°F (35°C) when the air is being supplemented with extra CO2. However, for CO2 to make a difference to your plants, you need relatively strong grow lights (i.e. big LEDs). But for those with strong grow lights, adding extra CO2 can result in faster growth as well as making it so plants can better handle the heat.

Choose Soil or Coco (Hand-Watered Grow) Over DWC/Hydro

Growing cannabis hydroponically can give you some of the fastest growth rates of any style of growing, but hydro does not really play well with hot temperatures because too much heat tends to trigger root problems and slower growth.

We talked about supplements that help prevent root rot for hydroponic plants, but the next step is to cut out the water reservoir altogether and go for a hand-watered grow. That’s because hand-watered plants are inherently much more resistant to high temperatures. Not only are the roots relatively safe from the heat (unlike in hydro) but the growing medium can hold a lot of oxygen no matter what the temperature (a lack of oxygen at the roots causes major problems in hydro). Plants grown in containers or in the ground tend to be more resistant to heat compared to hydro.

Soil in regular containers is probably the most common way to grow cannabis indoors, and that combo works great.

But when it comes to growing in hot temps, coco coir may be a better choice than soil. In particular, coco coir inherently has properties and hormones that encourage healthy root growth and promote hardiness against heat.

Soil is a good choice, but coco coir is even better when it comes to heat.

Keep Roots Cool

Your plant is much more resistant to heat if the roots don’t cook too, whether you’re growing in a pot or in a hydroponic reservoir. If you can find a way to help keep the roots around 70°F (21°C), your plant will suffer less and recover more quickly from a hot spell.

Watering your plant regularly when it’s hot will keep roots from drying out and help them stay cool. If the sides of the pots are getting hot from the grow light, put your potted plant inside a bigger pot (or find some other way to block the pot from direct light. This can help keep roots significantly cooler.

If the sides of pots are getting hot from the light, put the whole plant in a bigger pot to create an air gap and keep the roots out of direct light.

Use Fan Placement to Reduce Electricity & Bring Down Temps

Air conditioners can easily control the heat in any room but they use a lot of electricity, which can get expensive really fast! Unfortunately, a lot of growers are using an AC (or just dealing with too much heat) when they could actually reconfigure their fans to be able to maintain the right temps without needing an AC at all.

Proper fan placement can also help save costs because if you use fans more effectively you can use less of them. Fans use a surprising amount of energy that can really add up over time.

Being smart about fan placement and investing in electrically efficient fans can save you a lot of money. 

Exhaust Fans

The most effective way to control heat is to use an exhaust fan to vent hot air out of the grow space. Make sure your exhaust fan is set up to make sure you have the most cooling power. Here are some tips

  • Your grow space should be mostly sealed for an effective exhaust system. We highly recommend getting a grow tent for smaller grows to make this super cheap and easy. A grow tent with a strong exhaust fan creates a breezy plant environment that probably doesn’t even need any other fans. As an added bonus, a grow tent makes it easy to control smells with a carbon filter so no one can smell your plants even in the same room.
  • Your exhaust fan should be strong enough for the size of your space or tent. Avoid cheap ducting fans as they don’t move enough air to cool your grow light. 
  • Heat rises to the top of your grow tent/area, so make sure your exhaust fan is located at the top of the tent pointing out.
  • You want holes to intake air, about 4x the size of your exhaust hole if possible. When the intake hole is too small it’s hard on your fan, the exhaust won’t be able to vent as much hot air. With grow tents, the intake ports are already built-in so you just leave them open so air can get through.
  • The intake hole should have direct access to cool, fresh air. The inside of the grow space is always going to be at least a few degrees above the temperature of the intake air, so if the intake air isn’t cool the grow space will be even hotter. Cool air stays lower to the ground, so make sure your intake ports are as close to the floor as possible.

Ducting

Keep all ducting as straight and short as possible. You want a short direct line to the window so that hot air is immediately vented outside. Try to avoid using anything in the window that restricts airflow. Though it’s often necessary to use some type of screen to make sure no one can see in, try to do the best you can to obstruct airflow as little as possible. 

Window Fan

It may seem simple, but a window fan can be surprisingly effective at venting some of the heat if the grow light is raising the overall temperature of your room. In some cases, a window fan can cool your room by several degrees, which can help keep your plants cool. If grow lights are raising the temperature of your room, a  window fan can help vent heat and cool the room down by a few degrees.

In order for a window fan to cool a room most effectively, there needs to be some sort of “intake” for cool air to get in. It’s like a bigger version of an exhaust system. A separate open window in the same room is perfect, though an open door can also help, especially if there’s an open window somewhere in the house. However, even in a completely closed room, a window fan can help keep temps down somewhat in the room because it helps vent out heat from the grow light. Although blowing air out is often the most effective, if the air outside is really cool sometimes it helps to blow air in. Experimentation is good.

Oscillating Fans

Oscillating fans are perfect for reducing “hot spots” that form in the grow space. Particularly “wing” type reflectors can cause major hot spots because the heat from the light is beaming directly down onto the plant. If it’s really hot directly under the light, using fans to blow that heat away from your plants can make a huge difference in how much heat they experience.

In addition to oscillating fans, using a strong-enough exhaust fan with a big intake hole helps keep everything moving so hot spots don’t form. In fact, a grow tent with a good exhaust fan often doesn’t need extra fans because the exhaust fan itself will make the entire tent breezy.

Just be aware that adding oscillating fans doesn’t bring down the overall temperature in the tent, they just move air around. So if the room is already hot, adding more fans isn’t going to help.

To be continued…

5 Secrets To Controlling Heat Indoors-Part I

Are your indoor cannabis plants stressed out by the heat? Controlling heat in the grow room is one aspect of growing marijuana indoors that can be difficult for many growers. Grow lights provide our plants with lots of life-giving light, but they also get hot, and big grow lights can raise the temperature of a room by several degrees.

Each cannabis strain is a little different and some plants can handle hotter temperatures than others, but most plants start suffering from heat stress when their temperature gets over 85°F / 30°C. Some sensitive cannabis strains from cold climates (most often the short, squat, Indica strains with huge leaves) may start showing heat stress above 80°F / 27°C. To avoid heat stress, you must keep your grow space below a plant’s comfortable threshold. Controlling the temperature can even raise the overall quality of your buds since too much heat can reduce density, terpenes, and bud potency. This tutorial will teach you tactics that you can use to control temperature and fix heat problems to produce a plant paradise. You’ll also get some tips to help make sure your cannabis plants still do great even if it does get too hot.

1.) Supplements That Protect Against Heat Damage

Some supplements can help protect your cannabis plants so they are more resistant and/or recover more quickly from heat stress.

However, many different companies offer supplements and it can be confusing to decide which one – if any – is best for your garden.

Try to get supplements and nutrients from the same company

For the most part, there is no best supplement for heat (or anything really). A lot of different supplements will get you to the same place in the end. Because of that, when possible it’s a good idea to choose supplements made by the same company as your nutrients instead of trying to find the “best” supplement.

This is because during the process of creating a complete nutrient lineup, nutrient companies specifically test their supplements to make sure they work together with the nutrients in their lineup nutrients without causing lockout or other unexpected problems.

Use supplements to help protect your plants from heat damage if temperatures are rising too high.

Seaweed Kelp Extract

One of the best inoculants against heat stress is a surprising gift from the ocean; seaweed! As a bonus it contains small amounts of trace nutrients and minerals. Many different nutrient companies use seaweed kelp extract as part of their supplement lineup, which means you have a lot of choices to choose from if you want to incorporate seaweed into your grow.

A few companies offer seaweed extract by itself, it is a great choice for those growing outdoors or in super soil as they contribute to a healthy soil web matrix.

Pure sea kelp extract can be a great choice for soil growers who want to avoid using mineral-based nutrients.

If your nutrient company doesn’t offer a specific Sea Kelp product, you can almost always find sea kelp extract as an ingredient in one or many of their supplements. When starting out with supplements, it’s often best to start with something that matches your base nutrients and has sea kelp extract as an ingredient.

Silica Supplement

Supplementing your plants with extra silica (listed on the label of supplements as Potassium silicate) is not usually needed for healthy plant growth. There is almost always some amount of silica available and plants don’t need a whole lot of silica to survive.

That means if your plants aren’t stricken with a – super rare – silica deficiency and are living in a great environment, adding extra silica might not give you tangible benefits. However, if your cannabis plants are under specific types of stress or are generally living in adverse conditions, extra silica can make life easier for your plant.

Plant roots with access to silica (Si) happily drink it up and the silica gets incorporated into plant cells, increasing the strength of individual cell walls. These “armored” cells help improve the hardiness, vigor, and structure of the plant. Kind of like sending your plants to the gym.

Benefits of Silica Supplements

  • Plants supplemented with silica are generally more resistant to heat or cold stress as well as some types of disease
  • Silica increases the microscopic “abrasiveness” of leaves, which can act as a deterrent to pests and herbivores (like deer). In fact, if you’ve ever been given a paper cut by a piece of grass, you can thank silica for making those “sharp” edges.
  • Silica helps plants get the nutrients they need. Silica is effective at making phosphorus more available to the plant, which can be helpful in the flowering stage when the plant is going through phosphorus at a much higher rate due to the process of making buds.
  • Silica can also help the plant roots better absorb micronutrients (including boron, copper, iron, manganese and zinc) while making it harder for the plant to absorb certain toxic substances like aluminum and salt/sodium.

So again, silica won’t magically increase your plant growth, but it can help make up for some problems with the environment. Because of this, nearly all professional nutrient companies carry a quality silica supplement as part of their lineup.