A Beginner’s Guide to Hydroponic Growing-Part II

From the last blog, we have discussed something about hydroponic growing. What’s more? Read on:

What are the drawbacks of hydroponic systems?

It can be time-consuming and expensive for those setting up hydroponic systems for the first time. There are two other main drawbacks to consider before trying this growing medium.

Monitoring: Part of the time investment involves near-constant monitoring of the garden to ensure the health of the plants. If one cannabis plant in a hydroponics system becomes diseased, the entire crop may fail and die. Damaging microorganisms also thrive in wet environments and could threaten the health of the plants before harvest time.

Technology: Hydroponics is a good method for the tech-savvy cultivator who understands that a power outage can spell disaster. Even if the system runs on a back-up generator, an extended outage could leave you watering your garden and administering plant food by hand. 

If the pros of hydroponics outweigh the cons, you may be ready to try your hand at employing this growing medium in your home.

How do you grow hydroponics at home?

A dedicated space indoors is the best location  to grow hydroponics at home. In addition to the hydroponics system, you can furnish your garden with supplemental grow lights to maximize the health and volume of the cannabis harvest.

For outdoor growing at home, a sunlit patio or deck make ideal locations. But if you live in a cold climate, it would be better to keep your hydroponic cannabis garden inside. Otherwise, the plants will be subjected to the elements and vital water could evaporate if you do not consistently monitor nutrient solution levels.

Before you get started, you’ll need to gather the following supplies:

  • Hydroponics starter kit
  • Oscillating fan for ventilation
  • Carbon filter
  • Grow tent
  • Grow lights
  • Cannabis seeds with the strain of your choice

Once you’ve gathered those basic supplies, here are some quick steps to take to get your hydro system started at home:

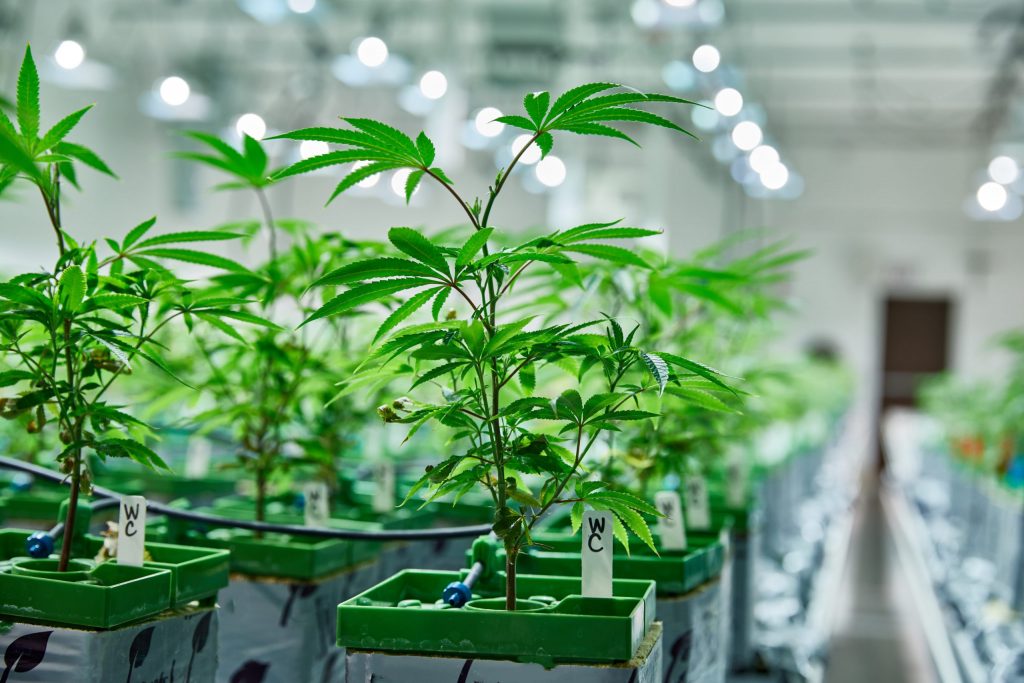
  1. Assemble the hydroponics system. Each system will be slightly different, but you can expect a starter kit to include a water tank, water pump (often part of a timed circulation system), LED grow lights, and a nutrient solution.
  2. Combine the nutrients and water in the tank or reservoir. Start up the pump and wait about 30 minutes for the nutrients and water to blend. Add beneficial bacteria and keep an eye on pH levels. Between 5.5 and 6.5 is the sweet spot for hydroponic gardens. 
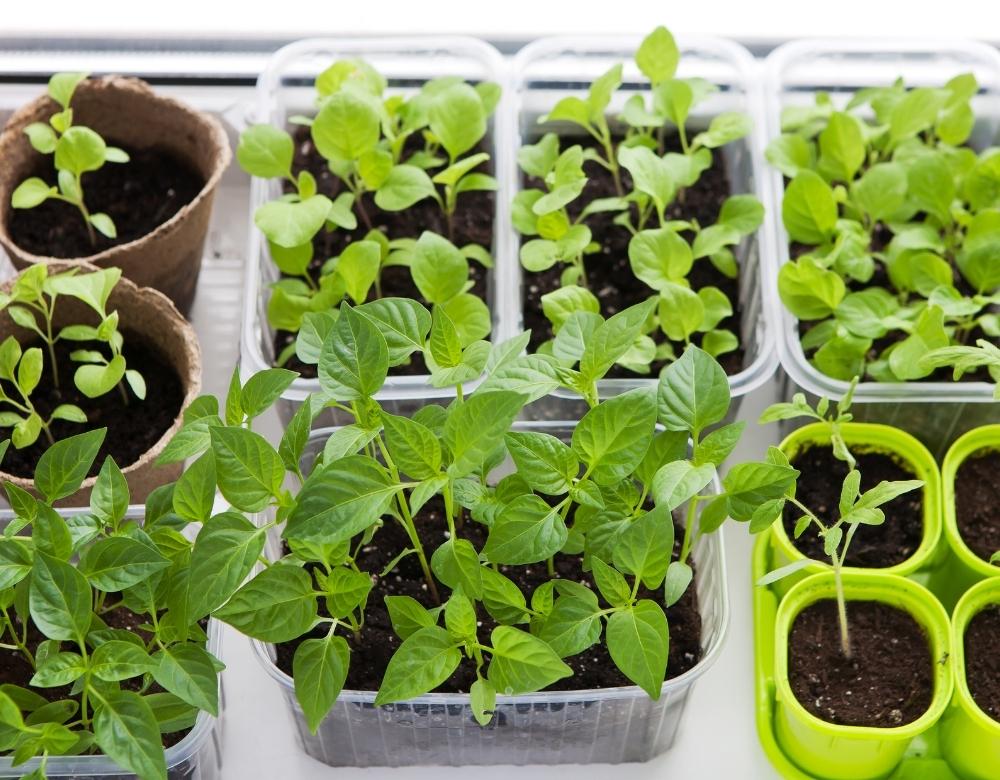
  3. Plant the germinated seeds and monitor progress through the seedling stage, which lasts about 3 or 4 weeks. 
  4. As plants move into the vegetative stage and flowering stage, you may choose to make a few adjustments. For example, during the flowering stage you may opt to try the cultivator’s strategy of defoliation to accelerate healthy growth. Nutrient levels should also be lowered during this phase as harvest approaches.

Bottom line

A hydroponic garden requires an initial investment of time and money but can be an excellent way to grow cannabis quickly and with minimal waste of resources.

A Beginner’s Guide to Hydroponic Growing-Part I

As a cannabis cultivator, you have an array of choices when it comes to growing your own herb at home — outdoor, indoor, and greenhouse cultivation, to name a few. But what about hydroponic growing mediums? Could this futuristic-sounding, soil-free method be the right solution for you? In this beginner’s guide to weed hydroponics, you’ll learn everything you need to know to start your own hydroponic garden at home.

What is hydroponic growing?

Hydroponic growing is a horticultural method for growing crops, including cannabis, without the use of soil. In place of soil, growers use a mineral nutrient solution in a water-based solvent. Occasionally, growers may also use clay pebbles and sand.

How does hydroponic growing work?

A good water-based nutrient solution forms the basis of all hydroponic systems. Like other growing mediums, hydroponics requires the other building blocks of ample light, air, and space.

Is growing hydroponic easy?

While a soil-based garden may be easier to start, hydroponics facilitate easier nourishing of cannabis plants over time. Nutrient solutions allow for more precise dosing and direct feeding of the plants in a hydroponic grow system. The roots of the plant directly absorb the administered nutrients, often making growth an easier and more efficient process. Plus, once you’ve set up the hydro system reservoir, there’s not much maintenance to worry about.

Do hydroponic plants grow faster than soil-based plants?

A hydroponic garden may exhibit a growth rate that is between 30% and 50% faster than that of a soil plant. The combination of nutrients, water, and oxygen in the roots are responsible for this faster rate of growth in hydroponic systems.

What are the benefits of hydroponic growing?

Besides the two most obvious benefits of a hydroponic garden (easier nutrient delivery and faster growth rate), there are several other advantages for cannabis cultivators to consider.

Water conservation: In rain-deprived places like California, water conservation is crucial. A hydroponics system may use 20 times less water than traditional soil cultivation. Water in this type of growing medium can be reused, meaning that none goes to waste.

Space saving: A hydroponics system is a major space saver that may require 20% less room than soil cultivation.

Clean and green: There’s no need for pesticides in the sterile environment of a hydroponic garden, so you can go green and organic when raising cannabis plants.

Year-round growing: Hydroponics systems can thrive in a variety of environments, but an indoor garden is especially desirable as you can grow your cannabis plants year round.

Potency: Once you harvest the buds, there’s a good chance they’ll be more potent than if you had grown them in soil. Some dispensaries even charge a premium for buds grown in hydroponic systems.

As many benefits as hydroponic systems offer, the growing medium also comes with some potential disadvantages.

To be continued…

Lighting Strategies for Leafy Greens

Greenhouse and indoor grown leafy greens and culinary herbs provide many advantages over field grown crops, including a more stable climate, more consistent time to harvest, the ability to control lighting, shading, CO2, and increased food safety. Low ambient light levels in the winter and on cloudy days, makes supplemental lighting essential for producing high quality, uniform greens year-round.  Since lighting is tied to overall quality and yields, it becomes important to have a reliable lighting system that can deliver on the goals you want to achieve.  With so many lighting options on the market, deciding which direction to go can be overwhelming.  At Aokairuisi, we produce and sell LED grow lights, and have been helping many growers to build their businesses and achieve their goals for a long time.

LED LUMINAIRES

LED luminaires can be a great choice for many leafy green growers thanks to their high efficiency and ability to dissipate heat away from the crop.  Other advantages of LEDs over traditional lighting, include PAR efficacy, ability to target specific wavelengths and control over light intensity (dimming).

HYBRID SYSTEMS

There are many indoor growers would like to use LED grow light, at the same time they don’t want to replace all the HID lights, and one of the best ways can be to implement a hybrid lighting system. A hybrid lighting system is where a growing facility installs both LED and HPS lighting in one grow space. In the case of an LED/HPS hybrid application, this combination can provide the ideal balance between diffuse light distribution and spectral efficiencies. It allows the flexibility to take advantage of the radiant heat from the HPS lighting, but also to extend the supplemental lighting period longer into the spring by using the LED lights only when outside temperatures and daylight hours increase.


Growing Weed in an Apartment 5 Tips-Part II

If you want to grow weed in an apartment, what should you do ? According to our last blog, you will need to: 1) check the terms of your lease; 2) take preventative measure; 3) prepare soundproof walls; 4) choose a suitable strain. Read on to find out more information :

5. Consider the growing space

There are several options for weed growing in an apartment: grow tents, wardrobes or grow boxes.

Wardrobes or closets are perhaps the first choice for growers considering a stealth grow. They offer privacy from curious flatmates, are often already in the room, and can be easily adapted with Mylar to optimize lighting.

Wardrobes, however, can be problematic in terms of controlling temperature, airflow, and humidity. Installing an effective exhaust/ ventilation system is a must.

Grow tents are also a popular choice and are available in a wide array of styles and sizes, often for very reasonable prices. They are usually straightforward to set up and are designed for apartment growing – a significant plus point. Grow tents are ideal at preventing the damage that often occurs in closet grows – water spills, damp etc. And they are also brilliant at preventing light leaks!

If this is your first time at growing weed, grow boxes are highly recommended. These compact grow spaces are usually supplied with virtually everything you need to grow marijuana – even hydroponics. Cost-effecting and time-saving, investing in a grow box takes away the uncertainty so you can look forward to the enjoyment of raising your first weed crop.

The don’ts for growing marijuana in your apartment

  • Use traditional HPS lights
  • Control humidity

Use traditional HPS lights

We recommend using the latest generation of LEDs if you’re growing in a flat. They are much quieter than other types of lights, so make it less likely your secret garden will be discovered. Growing weed with LED is also an economical choice with lower electricity cost and make it easier to control heat levels as they produce hardly any heat.

LEDs don’t shine as brightly as traditional HPS lights, so are less noticeable when glimpsed by a neighbor.

Control humidity

High humidity can lead to mildew or mold, which can quickly destroy your crop. Ventilation, as mentioned previously, is essential to keep the air moving and allow the plants to create. Many growers use a humidifier to lower moisture levels in the air. Invest in a hygrometer to remove any uncertainty. As a rule of thumb, humidity levels should be 50 – 70 percent during the vegetative phase and 50 – 60 percent during the flowering season.

Final words

It has never been so easy to grow in an apartment, especially with the convenience of online stores. Choose the right variety, use a grow box, and you should be able to cultivate a good harvest of delicious weed without worrying about losing your deposit or even eviction.

Growing Weed in an Apartment 5 Tips-Part I

If you live in a large town or city, the chances are that you live in an apartment or flat. If you fancy doing a bit of urban weed cultivation, it is certainly possible, but it is worth doing a bit of research first. Let’s look at the main dos and don’ts of growing weed in an apartment or small urban space:

What you should do when growing cannabis in your apartment

  1. Check the terms of your lease
  2. Take preventative measure
  3. Soundproof walls
  4. Choose a suitable strain
  5. Consider your grow space

1. Check the terms of your lease

Even if growing cannabis in your area is permitted for medical reasons, it is worth checking the terms of your lease if you live in rented accommodation, especially if you live in a house share. Growing weed is fun, but it isn’t worth potentially losing your accommodation if you end up being evicted. There may well be a clause in your lease that prevents you from growing anything that can increase levels of humidity or risk electrical fires from the lights, so get things checked out first.

2. Take preventative measure to reduce the impact of the smell

Now, if you love weed, there is a good chance that the lovely if somewhat pungent aroma won’t bother you at all. Still, if you want to stay on good terms with your neighbors and/or flatmates, it is wise to take some steps to eliminate the aroma that will inevitably come wafting from your grow tent. You need to use an exhaust fan that is connected to the activated carbon filter in the grow room and a general ventilation system that works well. This will also reduce the risk of mold affecting your weed, so is a win-win all round. Try and keep your grow tent air-tight, and this should allow someone to stand a meter away from your set-up without smelling any weed. If you are still worried about the smell, odor eliminating sprays can be very useful.

3. Soundproof your walls

Everyone worries about the smell, but few consider the increased noise levels of a grow room. Think about it, fans whirring, pumps and water gurgling if you use a hydroponic set-up. Choose a grow box that is soundproof, or take steps to soundproof all the walls of your apartment. Remember, a quiet grow room is a secret grow room.

4. Choose a strain that is suitable for indoor cultivation

Growing in a relatively restricted space means that some thought is required regarding the choice of strain. Whether you plan to use a grow box, closet or grow tent, you’d be well-advised to choose more compact strains for apartment cultivation.

To be continued…

Growing Weed in Closet Guide-Part II

Growing weed in a closet might sounds crazy, but the results will amaze you! As we expounded in our last blog, there are 6 preparing steps for growing weed in a closet. First of all, of course, we should prepare a closet first; Next is the right and suitable grow light, then the container. Read on to find out more steps:

4. Ventilation

Good ventilation is vital for weed plants to grow healthily. Stagnant air quickly leads to mould and damp and a ruined crop. You have to bring fresh air in from outside of the room and exhaust the hot air out of the room. No matter how you do it, you need to at least have cool air in and hot air out. And the whole point of bringing in fresh air is not just for temp control but also to replenish the CO2 the plants will be absorbing extremely rapidly.

Ventilation is probably the most difficult and confusing challenge you will need to overcome – even more so if you need to avoid detection. If your room has a window, leave it open as much as possible.

You could also install an exhaust fan, although this will involve some potentially noisy drilling. One option is to use a small oscillating fan – or two would be even better if you have the room. Place one desk fan at the bottom of the wardrobe blowing cool air in and one fan at the top (near the light) blowing the hot air back out. You will need to leave your closet door slightly ajar.

5. The growing medium

Soil is the obvious choice for growing in a closet, although it can be a bit messy when it spills. Soil is the foundation for a good weed crop so use the best potting mix you can afford, ideally one with a perlite blend. It will have enough nutrients for two to three weeks so you won’t need to worry about fertiliser for a while. You could also use coco coir.

You could also use a small hydroponics system which uses water as the growing medium. This method has many advantages allowing a greater degree of control over the irrigation and added nutrients. Plants also tend to grow more quickly so researching hydroponics is always something we would recommend.

It is worth remembering that weed smells as it grows so if you are worried about people finding your stealth grow, you need to choose less pungent varieties. Keep things discreet by keeping some clothes piled on top of the wardrobe for maximum effect. It’s fair to say though, that no method of growing weed is 100 percent safe from detection.

6. Invest in an air conditioning system

An air conditioning system is not strictly necessary but will make your life easier by performing the following functions:

  • Reducing the temperature – things can easily get a little too overheated in that closet!
  • Dehumidifying your room – use a hygrometer to check that the air doesn’t get too dry
  • Bringing in new air – if you are concerned about ventilation, an AC unit will definitely help.

How to care for your weed plants?

Once your plants are in place, you can relax and enjoy watching them grow – and they will grow fast. However, don’t close the door and forget about them! You will need to check on your plants at least twice a day – possibly more if they are showing signs of stress. Once in the morning and once at night is a good starting point. Check the soil to see that it is not too dry or too wet. You will also need to closely observe signs of change in your plants’ pistils to determine the right time to harvest so regularly checking on plants throughout their life cycle is a good habit to get into.

How many plants fit in my closet?

This really depends on the size of your closet, although it would be hard to fit more than ten plants in the largest type of wardrobe. For a small space, you can grow one or two plants. A large wardrobe with roughly the same grow space as a 3 by 3 grow tent can accommodate between two to four plants. If this is the first time you have grown weed – or anything – we recommend starting with one or two plants.

Growing Weed in Closet Guide-Part I

Would you like to grow your own but don’t have any garden space? Perhaps you have a lack of space in your apartment – or nosy neighbours? Never fear, there is an option that may surprise you – growing weed in a closet! Sounds crazy, but the results will amaze you. Read on to find out why growing weed in the wardrobe could be the answer you’re looking for:

How to grow weed in a closet?

  1. Preparing the closet
  2. Getting the lighting right
  3. Containers
  4. Ventilation
  5. Growing medium
  6. Air conditioning system

1. Preparing the closet

First of all, you will need to empty your wardrobe. Completely clear it of all clothes, shoes, magazines and anything else you may have lurking in there. You could opt for a cupboard or cabinet but wardrobes or closets are the ideal types of indoor furniture because of their size and the fact that they usually have in-built storage shelves. It needs to be at least four feet height and 70 inches in breadth. The higher the better, especially if you are planning to grow a tall plant.

Clean everything thoroughly. Give everything a good wipe with a mild bleach solution. It cannot be emphasised enough that no traces of dust, dirt and mould should be left in the wardrobe! Leave to dry.

Make sure the inside of the wardrobe is white. Most modern flatpack wardrobes are already white but if yours has a natural wood finish, get some paint and give it a makeover. This is to maximise the effect of the artificial lighting you will need to deploy.

2. Getting the best lights for growing weed in your closet

The good news is that there is no need to spend lots of money on really expensive lighting systems when setting up your closet. As the plants are growing in a confined space, too much exposure to light could harm your plants. However, choosing the best light is very important as it is the only source of light to which your seedlings will be exposed.

Three main types of light are suitable for closet grows. They are Fluorescent grow lights, High-Intensity Discharge (HID) grow lights and Light Emitting Diode (LED) grow lights. Each of these has its own set of pros and cons.

Fluorescent grow lights

Fluorescent grow lights are cheap, don’t emit a lot of heat, offer a broad light spectrum and use standard plug socket fittings. They work well in small spaces and are ideal for use on seedlings and the vegetative phase. However, most fluorescent grow lights aren’t as powerful as other light sources and this can affect the eventual yield.

HID grow lights

There are at least three types of HID lights: Ceramic Metal Halide (CMH), High-Pressure Sodium (HPS) and Metal Halide (MH).

HID lights offer a great spectrum for all stages. MH lights are ideal for the vegetative phase, HPS for the flowering and CMH for all phases. They have been used successfully by indoor growers for many years. It is essential to choose dimmable HID lights as they may produce too much heat in the confined space of a wardrobe.

HID lights give great harvests but will use loads of electricity. These days, they’re pretty much considered the old school option because of LED lights.

LED grow lights

LED lights are undeniably the best choice for stealth grows. They are easy to install, ultra-energy-efficient and emit little heat. If you are worried about electricity bills, LEDs are the right choice for you. They are long-lasting and available in a wide range of shapes and styles. Overall, we recommend LED lights for growing weed in a wardrobe. Check some amazing LED grow lights here: Shop

3. Containers

The world is your oyster when it comes to things you can use as containers. We’ve even heard of old computer towers being used, but whatever you use, make sure it has enough depth for the roots. Fabric pots are becoming increasingly popular. They allow excess water to drain and allow oxygen to access the roots.

To be continued…

Growing Weed in A Greenhouse: This Is What You Need to Know!-Part II

In the last blog, we explained the reasons why greenhouse growing is popular and some of its advantages. Let’s go on to see what you need to do if you choose to grow in greenhouse.

Growing weed in a greenhouse: what do you need?

A greenhouse is not suitable for everyone. You will require a garden as a minimum. Besides, there are some other things to think about:

  1. Location
  2. Greenhouse
  3. Pots
  4. Supplemental Lighting

1. Location and security

If you live in a street with neighbours able to see into your garden, a greenhouse offers better security from prying eyes than growing outdoors.

If you live in a more rural area, you could even get away with growing more than just a couple of marijuana plants here and there among your “regular” plants. The critical thing to think about in this situation is the smell, which will be stronger.

The structure of the greenhouse allows more security than planting in the open air because as it is an enclosed space, you avoid certain inconveniences such as visits of wild animals at night. However, discretion should be maintained if you live in a part of the world where cannabis cultivation is regarded as an illegal activity. Some growers paint the greenhouse glass with white shading paint to reinforce this isolation. You can find this at a garden centre, and it serves the dual purpose of preventing the greenhouse from getting far too hot on the warmest days during the summer. When you have a painted greenhouse, people will not be able to peer inside and identify what you are growing.

The often heady aroma of growing weed is heightened in a greenhouse, and minimising this is also something to think about. One answer is to mix the weed plants with equally smelly plants that like similar growing conditions, such as tomatoes. This will slightly reduce the weed smell, but if the thought of the pungent smell worries you, we recommend investing in an in-line ozone generator to eliminate it almost completely.

2. The type of greenhouse

Greenhouses are available in many different sizes and styles and prices that range from under thirty euros to many thousands. The cheapest models use a flexible clear plastic mesh sheet which closely fits over a small plastic or metal pole frame. These polytunnels are extremely cheap, but you will only be able to fit one or two plants inside. Another option is a greenhouse that leans against an exterior wall of your house. This provides easy access to your plants, additional insulation for your property and your plants will benefit from heat from the house.

If you have space, you could opt for a standalone greenhouse with plenty of room for many plants. However, small greenhouses are also made for people that live in a flat and only have a restricted amount of outside space, such as a small balcony. Polycarbonate greenhouses, for example, feature tough plastic panels instead of the traditional glass and are ideal if you are concerned about safety if you have small children running around. There is a greenhouse to suit you, whatever your budget.

3. Growing weed in pots or planting directly in the ground

Ideally, you should take advantage of the natural environment and plant seedlings directly in the soil, because this allows the plants to spread their roots better to produce more abundant crops. This also helps to avoid transplanting them constantly during their growth. They are also less likely to overheat and suffer from root burn.

However, if you plan to move them around, it is best to grow them in pots. This is an excellent way to better control the amount of water and nutrients they receive, while this is more complicated when watering directly on the ground. Measuring instruments are easier to manage when the plants are in pots than if the crop is anchored in the ground, which allows for more in-depth monitoring. Containers are also useful if you have to move them out of sight in a hurry.

When it comes to watering your greenhouse plants, you can choose from a wide range of possibilities; old-fashioned methods or more sophisticated dropper or spray watering systems. If you can afford it, you can invest in a hi-tech system that automatically provides water and nutrients to your plants.

4.Supplemental Lighting

Sunlight offers greenhouse plants optimal full-spectrum light, yet not all greenhouses reside in optimal conditions. During the beginning or end of the season, or in particularly cloudy regions, plants may still fall short of obtaining optimal light exposure. Supplemental lighting is usually considered in regions that receive less than 4–5 hours of good sunlight each day. Some growers may even intend to cultivate throughout the winter months, leading to a definite need for artificial lighting. Lighting cost are still lower in a greenhouse, as lamps won’t need to be turned on for as many hours during the day when compared to an indoor growing operation.

In this case, we recommend that growers using LED grow lights for complementary lighting. If you’re looking to buy some grow lights, our lights are UL , CE and RoHS approved, visit our store here: Shop

Growing Weed in A Greenhouse: This Is What You Need to Know!-Part I

Many weed cultivators use greenhouses for their plants. But why are they so popular? This article about growing weed in a greenhouse will investigate the many benefits of greenhouses and answer some of the questions you may have when considering which setting is best for your personal situation.

What is a greenhouse and how does a greenhouse work?

A greenhouse is an outside structure consisting of a metal frame and numerous glass panels. It creates an artificial microcosm climate in which plants can thrive, even when the weather is harsh and cold outside.

Greenhouses work by utilising a simple scientific principle known as ‘the greenhouse effect’. As light passes through a transparent material (glass in this case) and meets an opaque surface (plants, anything inside the greenhouse), some of the light energy is transformed into heat.

The darker the opaque surface, the more heat it will absorb. Greenhouse panels are highly effective at transmitting light but not heat so most of the heat remains inside the greenhouse where it will benefit the plants inside.

The advantages of growing cannabis in a greenhouse

Greenhouse cannabis cultivation is becoming more and more popular as it combines the benefits of indoor and outdoor cultivation. It is a simple and inexpensive method, after the initial set-up costs, since the facilities required for indoor cultivation are not necessary, as well as making the most of the free sunlight as in a garden plantation. At the same time, it has the advantage of sheltering outdoor plants from the vagaries of the weather. The simplicity of its equipment and the discretion it provides are the reasons for the resounding success of the humble greenhouse. Yet, there is more:

  1. Growing outdoors with the benefits from indoors
  2. Extending the growing season

1. Growing with the benefits from indoors

A greenhouse makes it possible to grow outdoors, with all the advantages that this implies, such as controlling growth phases and ensuring rats, birds and deer are not able to destroy the crop. In the beginning, you might feel that the assembly seems tedious or that it represents a significant investment. Still, nothing is further from reality: this installation can be simple or sophisticated, it depends on what you want.

The greenhouse mixes the positive and natural elements of outdoor cultivation with protection from less desirable features. The higher degree of control is particularly appreciated in the northern regions, where growers are more exposed to cold and lack of light. In the southern Mediterranean, for example, the climate should facilitate cultivation throughout the year, without hardly any need for intervention. 

2. Extending the growing season and controlling phases of culture

Probably the most powerful feature of a crop of this type is the ability to control the climate and cycles and thus obtain several crops per year, vastly increasing yields. These types of intervention are not possible with outdoor plants, which are at the mercy of temperature and season changes. Greenhouses allow you to limit the exposure of cannabis to the sun and so deceive into flowering earlier. Indoor growers perform this trick with artificial lighting.

There is another good reason to start the growing period earlier: to extend the plant’s growing phase. The longer it is, the more abundant the plants and the more intense their flowering. And as a reward, the final harvest will be much better. For this phase to be a success, it is essential not to allow too much cold the first nights, by using the heaters when necessary.

Thanks to the greenhouse, it is possible to harvest in early August, replant and harvest again in autumn. The artificial environment created manages to retain heat, so growers can start planting cannabis a little earlier than outdoors.

The use of heating devices allows the cultivation to continue even when the cold arrives. Then, in summer, when the high temperatures come, ventilation systems can be deployed to keep the plants in good condition. Ventilation and humidity control is an integral part of cannabis greenhouse management to prevent the plants from succumbing to mould, milder and diseases. To be able to photosynthesise, the grower needs to keep the airflow cool, which is challenging to do in an outdoor crop; in fact, heat constitutes a strong threat which can stress the plants and affect their productivity.

To be continued…

Positioning LED Grow Lighting for All Stages of Marijuana Growth

Lighting is one of the most critical factors in growing marijuana. Understanding how close or far away to position the light source from marijuana plants is essential to produce a healthy plant and maximum yield.

Seedling Stage

For marijuana seedlings, LED grow lights should be between 24-36 inches above the plant canopy (a plant canopy is: the tallest branches of foliage of your marijuana plants). Seedlings are delicate, and placing lighting closer can cause bleaching or stunted growth. Placing the light source at this height also avoids drying out the soil. At the seedling stage, less light intensity is best.

Vegetative Stage

When marijuana is in the vegetative stage, it needs more intense light. The marijuana needs to build strong, healthy roots and stems to produce a productive harvest. Grow lights should hang closer to the marijuana plant canopy. The LED grow lights should be between 12-24 inches from the top foliage of your marijuana canopy. Monitor the plants closely to make sure they have enough light and not too much, which can cause adverse effects such as bleaching, discoloration, stunted or irregular growth. These effects can be addressed by adjusting the height of the LED grow lights.

Flowering Stage

The flowering stage is the final stage of “growth” for the marijuana plant. It is during this stage that flowering and fruit production occurs. During the marijuana flowering stage, the LED grow lights should be between 16-36 inches above the marijuana plant canopy. To transition plants from the vegetative to the flowering stage, it is best to gradually raise the LED grow lights to the desired distance for your specific marijuana crop height and flowering needs.

LED Grow Lights and Clones

Cloning marijuana plants is the process of taking cuttings from mature marijuana plants and re-planting them. These cuttings are not seeds, and require treatment much like vegetive plants. Place the LED grow lights between 12-24 inches away from the marijuana plant canopy. Keep in mind that they do not have a root base yet and need to establish that root base. It is best to start your LED grow lights further away and slowly work closer to establish that root base. Clones need to be observed closely for any adverse effects, as discussed earlier.