Lighting Considerations For Growing Cannabis In A Greenhouse

Greenhouses are an important technology in the eyes of gardeners. They allow growers to save energy when it comes to lighting and heating by taking advantage of natural resources. At the same time, they don’t expose plants fully to the elements of the outside world. They protect against harsh winds and cold snaps, whilst enhancing heat and light.

Perhaps the greatest benefit of cultivating within a greenhouse is the extension of the season. Growers can utilise the sunny skies of early spring and late autumn, periods when plants don’t thrive particularly well outdoors. This enables growers to get a headstart on the season, and also means extra time at the end of the season to let plants fully mature. This is especially useful in regions of the world that experience shorter summers.

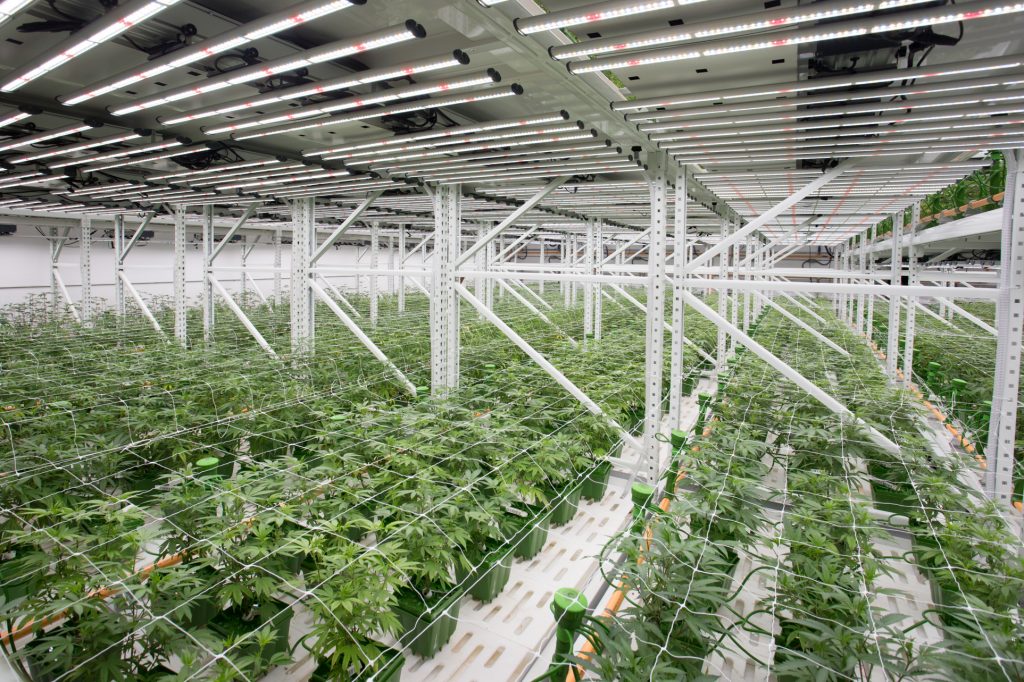
Although most greenhouse grows will do well using just the light of the sun, some cultivators opt to install supplementary lighting to achieve maximum yields. This may seem as though it defeats the purpose of using a greenhouse in the first place, but it still means using less artificial lighting than when growing entirely indoors. It also means plants get access to full-spectrum natural sunlight, only to be topped up with artificial sources when necessary.

SUPPLEMENTAL LIGHTING

Sunlight offers greenhouse plants optimal full-spectrum light, yet not all greenhouses reside in optimal conditions. During the beginning or end of the season, or in particularly cloudy regions, plants may still fall short of obtaining optimal light exposure. Supplemental lighting is usually considered in regions that receive less than 4–5 hours of good sunlight each day.

Light cycles of between 18–24 hours are used during the vegetative phase of the grow cycle, making it necessary to install additional lighting after the sun has set and before it has risen. The shift to a light cycle of 12-12 is what causes photoperiod strains to enter the flowering phase of the grow cycle.

Outdoor plants don’t necessarily require the same manipulation of the light cycle, as the natural cycles of the sun cause this shift naturally over time. However, supplemental lighting can still be used to extend the light cycle to as long as possible, within the flowering boundaries.

Some growers may even intend to cultivate throughout the winter months, leading to a definite need for artificial lighting. Lighting costs are still lower in a greenhouse, as lamps won’t need to be turned on for as many hours during the day when compared to an indoor growing operation.

Because light is needed for the process of photosynthesis, if plants are lacking in this vital resource, then resulting growth and yields will be suboptimal. When it comes to installing supplemental lighting, there are numerous types growers can choose from, depending on their needs and preferences.

Light spacing within a greenhouse will be spread further apart than with indoor setups due to additional light from the sun. Greenhouse grows will usually feature ⅓ to ½ of the lamps used indoors.

Why And How To Clean Your Cannabis Grow Room

Cultivating cannabis indoors gives you increased control over your growing environment. In this setting, you are able to tightly regulate water, light, nutrients, and even carbon dioxide. An indoor setting also offers your plants increased protection against pests and disease. By keeping every aspect of your cultivation space clean, you’ll stay organised and minimise the risk of pathogens and pests reducing yields or even killing your plants.

Why It’s Important To Clean Your Grow Tent Or Room

The cleaner your grow room, the lower the chances of facing pesky pests, pathogens, and mould. Increased hygiene reduces the spread of bacteria and fungal spores that can damage cannabis roots, leaves, and flowers.

Paying extra attention when introducing plants and other objects into your growing space can help to keep pests. While beneficial insects are a welcome sight, pest insects can quickly lay waste to leaves, stems, buds, and branches.

Ultimately, keeping things clean will benefit plant health and yields. Any disease, mould, or pest has the potential to throw a spanner in the works. You’ll have to spend time and effort eradicating them when they set in, and any major damage will stunt growth and possibly impact your harvest.

Best Practice: Clean Before You Grow

Starting out with a clean grow tent or room will drastically reduce the chances of pest and pathogen problems. Prevention is always superior to a cure. Before getting your grow room going again, it helps to give it a thorough clean between each growing cycle. 

Of course, this becomes much more crucial if you’ve just spent weeks dealing with pests and pathogens. However, a deep clean will help to minimise any risk, even if your tent is fresh out of the box.

  • Cleaning a New Grow Tent

A brief clean-up will do the job in new tents or older tents that never experienced any pests or mould issues. Simply wipe down the ceiling and walls with anti-bacterial wipes and give the floor a good sweep.

  • Cleaning an Affected Grow Tent

If you experienced pathogen and pest problems during the previous growing cycle, you need to take more drastic measures before starting a new indoor crop. As opposed to a light clean, you’ll need to fully disinfect your growing space.

Spores, viruses, and bacteria are microscopic and can cling to surfaces that look squeaky clean to the naked eye. Take action now to save yourself a lot of potential trouble later on. Use the options below to start your next generation of plants on a clean slate.

– Bleach

Bleach takes no mercy when it comes to microbes. This potent alkaline solution works as an effective disinfectant capable of wiping out bacteria, fungi, and viruses. Make sure to wear gloves when applying bleach. Also, consider wearing eye protection, especially when applying overhead.

Mix 1 tablespoon of bleach into 1 gallon (~3.79 litres) of water. Give it a mix and apply it to all of your grow tent surfaces using a sponge or cloth. Allow the surface to remain wet for a couple of minutes while the bleach kills off any microbes before drying all of the surfaces with a towel.

– Hydrogen Peroxide

Hydrogen peroxide also lays waste to germs. Even at a concentration of 3%, as found in most solutions available from stores, this substance can wipe out infectious microbes. Use a cloth to wipe down all of your tent surfaces with this non-toxic disinfectant.

– Drop a Bomb

Insect bombs help to remove any traces of insects from your growing room. They are especially useful if you suffered badly from pests during your last grow. Simply remove the lid from an insect bomb to purge out any insects, mites, or other pests.

How To Maintain a Clean Grow Room

At this point, your room should look as clean as a whistle. But you’ll need to maintain a high level of cleanliness going forward. Things start to get messy, fast. Introducing soil, plants, and other objects into your grow room carries the risk of importing insects, their eggs, bacteria, and fungal spores.

  • Routine Cleaning

Keep organic material such as soil and plant matter off your floor and tables. These provide good shelter for detrimental critters. We recommended a Shop-Vac when it comes to vacuuming your growing space. These devices feature a high-efficiency particulate absorbing (HEPA) filter that captures fungal spores and bacteria, preventing them from re-entering your space once sucked up.

  • Integrated Pest Management

Integrated pest management (IPM) takes a sustainable approach to dealing with grazing insects. Many growers introduce companion plants, cover crops, and even beneficial insects into their grow rooms to help to deal with pests without the use of harmful chemicals.

Common examples of IPM include:

  • Soapy water against aphids
  • Ladybug larvae against mites
  • Crimson clover cover crop against fungal diseases and parasitic nematodes
  • Neem oil as a natural pesticide

Using LED Grow Lights For Cannabis: 6 Mistakes to Avoid-Part II

In the last blog, we mentioned the first two of the 6 mistakes. They are improper light distance and overwatering. Today’s blog will lead you to the rest common mistakes. Let’s start with the third one:

3. CHOOSING THE WRONG TYPE OF LED LIGHT

Most LED grow lights you can find today are “full spectrum” lights, which is sort of a buzzword that means you can use them for vegging and flowering. But there are also models outfitted with a switch that allows you to change the light spectrum according to the phase. Moreover, some LEDs are made only for veg—emitting a bluish light that supports fast and vigorous growth—while others are made for bloom, giving off a reddish light to support bud development. So, before you get an LED light, make sure it’s the right type. For most growers, a full spectrum LED is likely what you’ll want.

4. CHOOSING LOW-QUALITY LED LIGHTS

There are now tons of low-quality LEDs available on the internet, and these manufacturers are not prioritising quality. These cheap LED lights are often claim to provide more light than they’re actually capable of. Some of these lights are only able to grow one plant (if you’re lucky), and not much more. Low-quality LEDs can also be dangerous with low quality.

Lastly, if you get a cheap LED randomly and you run into trouble, you will likely have a hard time with warranties and returns. As almost nothing is as important as your lights when growing cannabis indoors, it’s simply not smart to cut corners here. By spending a bit more on a quality LED, you and your plants will be so much happier. Plus, high-quality LEDs are much less expensive to run than HIDs, so you’ll surely save some serious cash on your energy bill over time! Buy from Aokairuisi Team who has more than ten years of experience in producing and manufacturing LED lamps and whose products have passed CE and UL certification. The product quality is guaranteed, and all kinds of problems are solved by professional personnel. How to cooperate with us

5. NOT PROVIDING YOUR CANNABIS PLANTS WITH ENOUGH LIGHT

The issue with many of those cheap “beginner LEDs” is that some manufacturers intentionally confuse the grower with specs and numbers, such as wattage. This seems fine, except that, with LED lights, wattage doesn’t really say how much light the LED is emitting; it says how much energy is required to produce the light. Instead, we’re measuring in lumens—the amount of light actually emitted. So, regardless of how high the wattage is, the light could still have a poor spread and/or doesn’t penetrate the canopy well. In other words, don’t fall victim to misleading information, and consider the source of your product.

Providing your plants with enough light can become an issue if you want to grow more than one. For example, one single 300W LED light fixture may be fine for one or maybe two plants, but it may not be enough to cover a bigger space with multiple plants. So make sure to reference any recommendations from the vendor and/or LED manufacturer on how much light you will need for your growing space. You can also contact our Aokairuisi Team to know more about using a particular LED. Contact Us

6. PROVIDING AN IMPROPER LIGHT SCHEDULE

At most high-quality seed shops, you can get autoflowering cannabis seeds and feminized photoperiod cannabis seeds. Autoflowering strains are relatively easy to grow, especially when it comes to lighting: You can just keep them under an 18–24-hour daily light schedule from the moment you plant your seeds up until harvest. They flower automatically after a few weeks of growth, which makes them very convenient.

Feminized (photoperiod) strains, on the other hand, are typically grown under 18–24 hours of light in the vegetative stage, then under 12 hours of light and 12 hours of darkness to initiate and sustain flowering. This shouldn’t be a problem, as most growers will set their lights on a timer for this very purpose. Then again, for someone who’s just starting out, they might not feel confident tailoring different light cycles and spectrums, especially if their setup doesn’t utilise full spectrum lights. It’s certainly not impossible for beginner growers to swiftly get the hang of maintaining proper light schedules, but sometimes the new tech of LEDs can lead people to make silly mistakes. In that case, you may wonder why your plant is reaching gigantic heights, but won’t grow you any buds!

Using LED Grow Lights For Cannabis: 6 Mistakes to Avoid-Part I

Growing great cannabis is not really difficult—at least in theory. Get yourself some quality cannabis seeds, good soil, proper containers, and you’re already off to a good start. However, if there’s one factor that’s especially crucial to developing superb cannabis, it’s light—a lot of it. Indeed, cannabis plants require more light than most other plants, and they optimise performance if light exposure is significant and consistent. As such, you really don’t want to skimp when it comes to your grow lights.

In the past, weed cultivators largely used HID lights—with MH (metal halide) lights used for vegging and HPS (high pressure sodium) lights employed for flowering. However, LEDs are exponentially taking over grow rooms around the world. Why? Compared to HID, LEDs have some convincing advantages: They use (a lot) less electricity, allowing you to save money over time and reduce the footprint you leave on the environment. They also emit less heat, which can be a big advantage, especially in small grow setups. Lastly, LEDs have recently become more affordable as the tech has become widespread, allowing home growers an opportunity to benefit from this unique and powerful lighting system.

Yet, even the fanciest LED lights cannot prevent growers from making mistakes in their grow. Let’s delve into some common errors, slips, and faux pas to avoid when growing cannabis with LEDs.

1. NOT SETTING YOUR LED LIGHTS AT THE PROPER DISTANCE

This is probably the most common mistake that inexperienced growers make upon just starting out with LEDs. Since HID lights emit a lot of heat, out-of-the-loop growers might be overly cautious with their LEDs, placing them too far away; alternatively, those aware of the benefits of LEDs might get cocky and place the lights super close. If you hang your LEDs too far away, there’s a good chance your plants will over-stretch in an effort to reach closer to the light. If, on the other hand, you place your LEDs too close to your cannabis plants, this can stress the plants more than they can comfortably handle, causing burning and bleaching of the foliage and buds.

So, what is the ideal distance between your grow lights and your plant canopy? Unfortunately, there is no standard, since the best distance during the vegetative and bloom phases of your cannabis will depend on your specific LED. Each type can vary slightly, therefore affecting the final distance they should be from your plants. You can check with our Aokairuisi Team for any information on recommended distance. (Contact Us) Under normal conditions, you can keep your LEDs somewhere between 30–45cm from the canopy—around 45cm during veg, then a little closer when your plants are flowering.

When adjusting the height of your LEDs for peak performance, keep an eye out for any oddities. Dry, curled, brown, or bleached leaves signal too much light, calling for your LEDs to be raised higher. 

2. OVERWATERING YOUR CANNABIS PLANT

Because good HID lights emit a lot more heat than LEDs, soil normally dries out quicker when utilising the former. Once growers make the switch, however, they often forget to take this into account. Given the significant reduction in heat, it’s likely your plants will need less frequent watering. So adjust your schedule accordingly when using LEDs, especially if you’re new to it. Overwatering is a common and sometimes serious error beginners make that paves the way for a host of pests and diseases to take hold. So this is really important to keep an eye out for. When in doubt, let your soil dry out—then you can water again.

How To Grow Vegetables Indoors-Part II

In the last blog, we talked about some vegetables that can grow well indoors. Today’s blog will continue to show more information, let’s get started!

Growing Root Crops

This is a bit of a grab bag, but several root vegetables grow well indoors.  Garlic can be grown for their greens or the bulb. Radishes are also well-suited and give a quick and easy return. Even though they look similar, we steer away from carrots because they take much longer and require more sun. Ginger and turmeric have slightly higher light needs, but are also great indoor plants.

Setup & Supplies For An Indoor Vegetable Garden 

What’s The Ideal Light To Grow Vegetables?

Vegetables need lots of light to grow, and even more to be productive. You may be able to grow them with natural light, especially if you start in spring in a very bright window, but most people need to use a grow light. Grow lights are a good match for vegetable plants because they can be lit for 12 hours (or longer) – for some vegetables, this “day length” is a signal that it’s time to grow vegetables. All vegetables have about the same light needs, so once you know how to use indoor light for vegetables you can grow them all. If you need some information about plant growth lights and indoor growing, you can contact us by clicking here: Contact us

What Type Of Planters & Soil Should You Use?

We recommend filling a ceramic self watering planter with a standard potting mix for all vegetables. We’ve tried all sorts of hydroponic and planters, and have found them to be the simplest and most reliable. The early harvest and root vegetables are simple enough, you’ll just keep the soil consistently moist and a regular fertilizer schedule. There’s a small trick to ripe vegetables – they’re much sweeter if they ripen with drier soil, and the ceramic self watering planter lets you easily control this.

Growing & Harvesting Your Indoor Veggies

Pruning & Picking For Long Productive Harvests

Knowing when to harvest your vegetable is the key to unlocking crisp, sweet produce. You’ll learn to recognize color changes, firmness, and develop a sense for when they “just feel ripe.” They will look different than produce in the supermarket which is almost never picked at peak ripeness – they’re more concerned with size and how well it ships – so if this is your first time in the garden be sure to read about harvesting for peak flavor.

How To Grow Vegetables Indoors-Part I

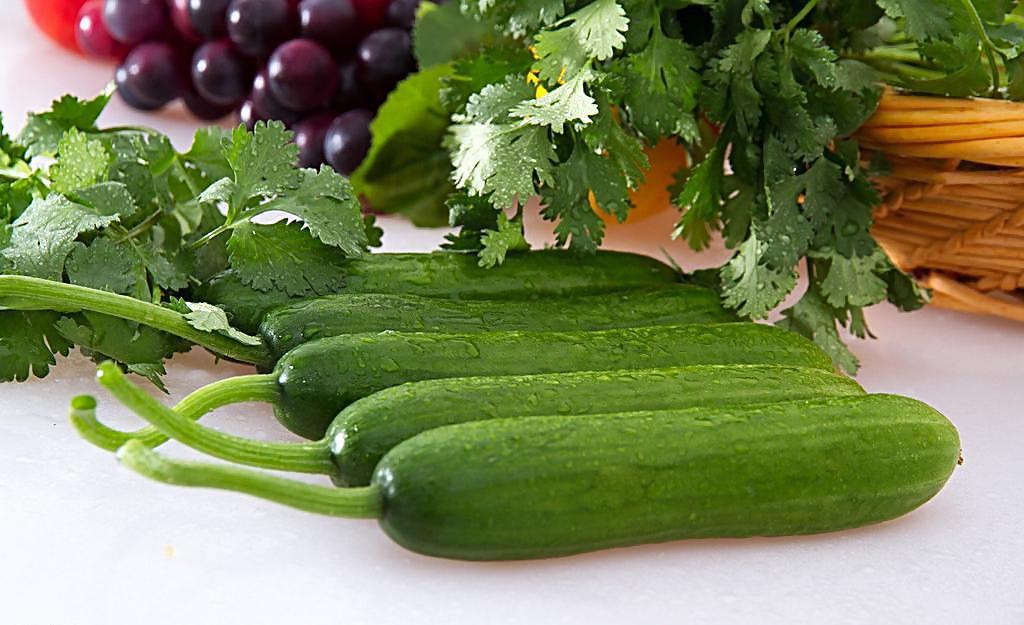
It may come as a surprise, but many vegetables can grow well indoors. They need a bit more light and space than herbs or lettuce, but there’s productive and beautiful options that are well worth it. Fast growers, like cucumbers, can be first picked in just 2 months and put out 100 cucumbers per year. Longer-lived plants, like tomato and pepper, are some of the most beautiful with their dark green foliage and colorful veggies. This blog will give you an overview of your plant options, grow area, and what it’s like to have an indoor veggie garden.

What Types Of Vegetables Can You Grow Indoors?

Many (though not all) types of vegetables are possible to grow indoors. From a gardening perspective vegetables fall into three categories: ones you harvest as soon as the vegetables form, ones you let ripen on the vine, and ones that grow as roots.  

Fast Growers: Cucumber, Beans, And Other Early-Harvest Veggies

The easiest vegetables are a group called “Early Harvest” because they reach peak flavor right after they form. Freshness is most important with this group as they lose their sweetness quickly (sugars begin turning to starch within minutes of picking) and need to be picked at just the right time (they get pithy and tough if allowed to grow).  Because they don’t need time to ripen, they’re the fastest veggies to harvest (beans and peas in 6 weeks, cucumbers in 7). The added benefit of picking them early is that it stops the plant from completing its lifecycle, which forces it to stay productive longer.  Looks-wise, they tend to be a little leafy but do have nice flowers. Still, the primary reason to grow these is flavor – being able to pick them at their peak flavor and eat them immediately is only possible with homegrown vegetables.

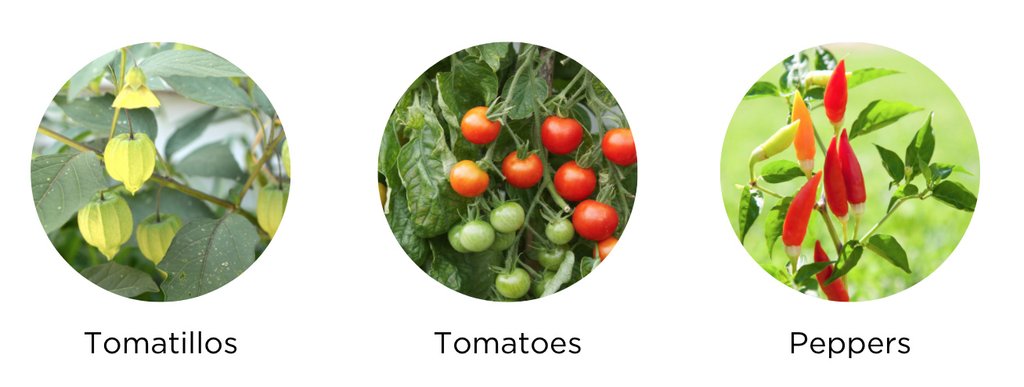
This category includes:

Slow & Steady Growers: Tomatoes, Peppers, And Other Ripe Veggies

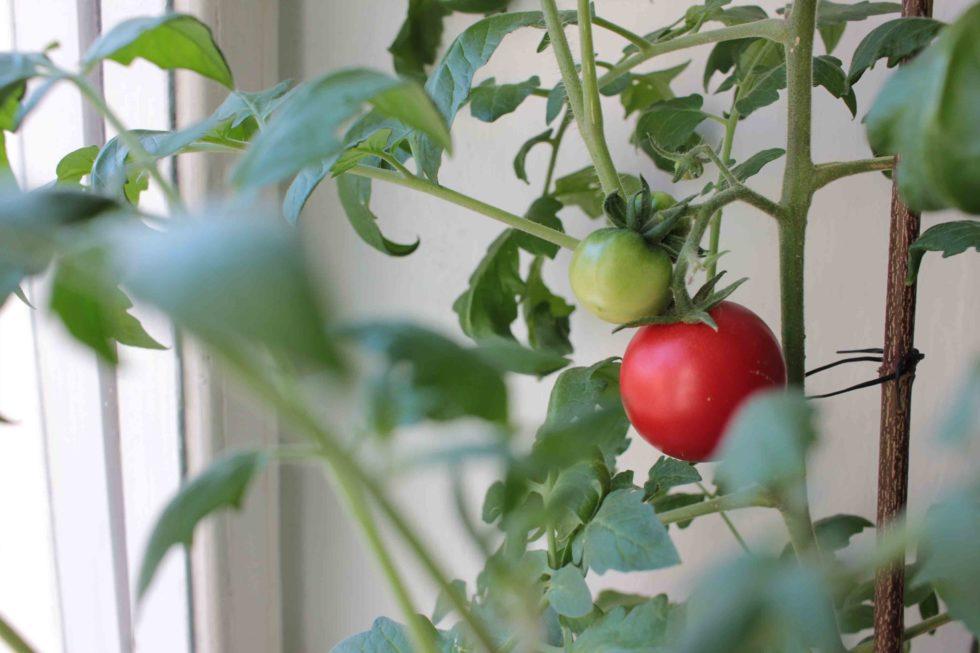
These take a little more time to start harvesting but can live for years with the right care. Unlike the early-harvest vegetables, these plants don’t shut down after they ripen. In addition to being able to grow better tomatoes and peppers than you can buy, these plants have beautiful flowers, foliage, and fruits. Peppers look nice, but don’t taste that much better than store bought – though there are many more types of hot pepper that you can grow than typically. Homegrown tomatoes on the other hand are in a class of their own. 

 The group is:

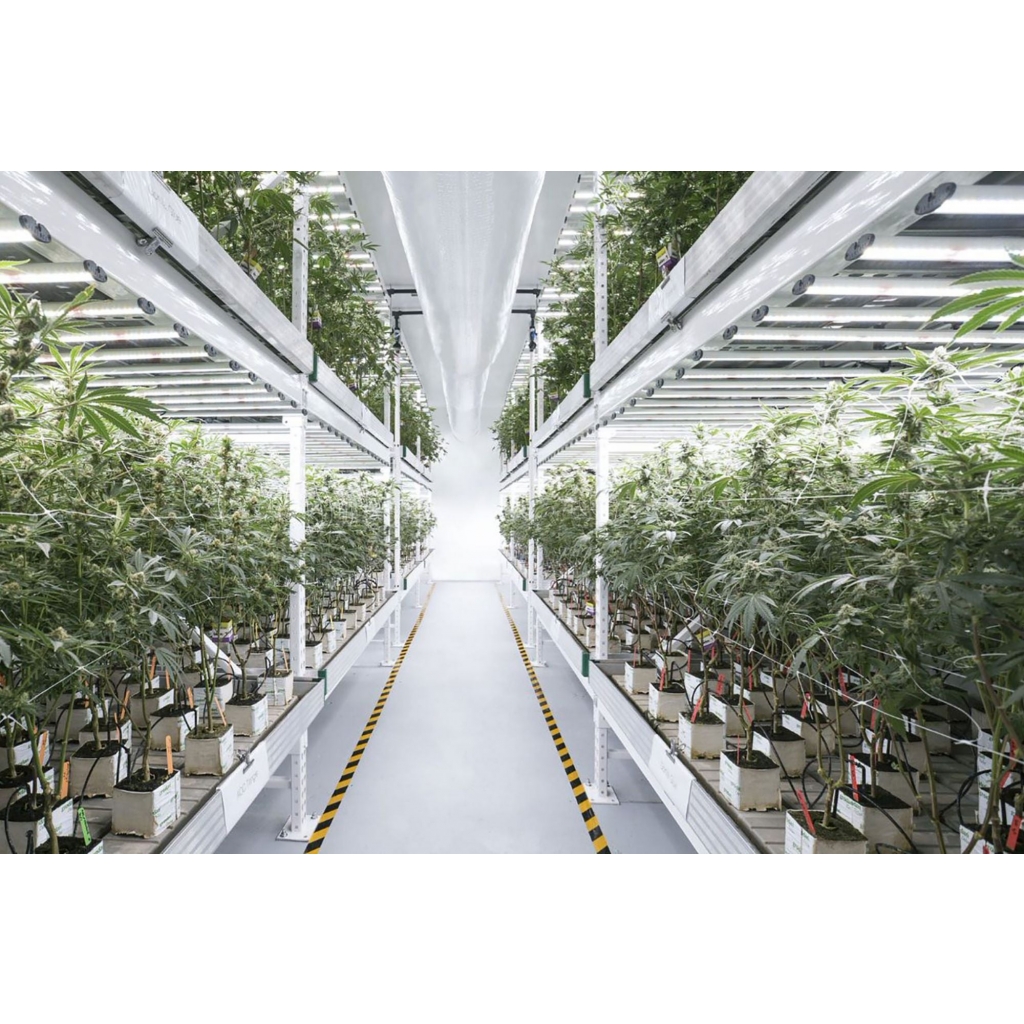
Vertical Farming And Cannabis Cultivation

Cultivating cannabis plants, especially in confined or discreet places, can be tricky. The more plants you want to grow, the more power you’ll need for lighting. In traditional horizontal setups, the plants will grow one next to the other. Most of the light coming from the source will not reach the plant. More space is taken up and energy is used less efficiently. Stadium growing is where plants rise on tiered shelves around a central light source. This solves part of the problem by increasing the amount of light reaching the plants. However, there’s an even more efficient way to grow plants in tight spaces.

VERTICAL FARMING

Vertical growing has been known to more than double the amount of space available for cultivation compared to horizontal growing. Multiple shelves can be stacked in a square or hexagon around a central light source. Plants can produce impressive yields when arranged properly in these conditions. They can be stacked on shelves or arranged with trellises and strings. These setups take up less space for growing, allowing you to potentially grow more plants. It also reduces your energy bill along with the environmental impact of indoor growing.

The central light source will need to be kept cool. This will be easiest to manage with energy-efficient LED lights. A cooling fan under the central light source should dissipate heat upward. Wherever you’re doing this, good ventilation is a given. As your plants grow, be sure to trim unproductive parts. You can also use the string grids of screen setups to shape the growth of plants further. You want a nice even shape to your plant. Be sure to rotate your crops so that each side gets an equal amount of time facing the central light source.

DIFFERENT HYDROPONIC SYSTEMS

You should see hefty yields from resilient strains at any time of year with this setup. You just need one more thing – a steady water supply for cultivation. Maximising the efficiency of your watering schedule requires a resourceful hydroponics system. There are number of ways to set up the distribution of hydration and nutrition effectively. The arrangement of the plants makes a difference, such as whether they are inside a tent or a larger space, or if they can be mechanically rotated around a light source. It is also possible for the vertical light source to come from the perimeter and not the centre of the plants.

Once you have the materials assembled, they will impact what kind of hydroponic system you can run. For example, using corrugated piping to spiral around your light source makes watering easy with hosing setups. It is also possible for nutrient film to drip water and nutrients onto your plants gradually. This can be done to the roots of plants, or continuously above with well-positioned drippers.

If you take cannabis cultivation seriously, it’s time to start being economical with your time, energy, and space. Vertical cultivation could be the solution you need to get more bang for your buck.

QUICK TIPS FOR VERTICAL GROWING

Finally, we want to give you some quick tips for vertical growing to help you get started:

• Choose the right strain

Since you want to maximise your space and grow as many plants as possible with a preferably even canopy, the first important consideration is the type of strain you want to grow. You want short-growing, non-stretchy plants that don’t overgrow their given space. Also, the flowering phase should be initiated as soon as possible to keep their height manageable. Furthermore, it is a good idea to opt for strains that are resistant to diseases because they pose a common threat in vertical grows.

• Plan your grow room accordingly

By this, we mean leave enough space around the racks for plumbing, air movement, and worker access. Of course, you want to maximise your yield and pack as many plants into a room as possible, but you should not forget that the room needs to be functional for you as a grower as well. That means the grow trays must be removed regularly for cleaning and replacing purposes. If you don’t leave enough space for these kinds of grower tasks, your vertical grow can become frustrating very quickly.

• Choose the right light

You want a light that can penetrate your whole canopy evenly and at a close distance. While there exist several options for said lights, the best are definitely LED lights due to the very low amount of heat they emit. LEDs have the best light spectrum options (oftentimes adjustable) for the different growing phases of cannabis, and are just as powerful as other light sources. Visit our store for some excellent grow lights here: https://ledgrowlight.co/shop

• Keep your watering system clean

As with all automated watering systems, reservoirs and pipes should always be kept clean to avoid the risk of salt buildup and the formation of bacteria. Moreover, you should replace all the plumbing between the reservoir and spigots every few cycles to ensure a clean delivery of nutrients. Additionally, you should plan how to manage your wastewater. Most of the time, floor drains will suffice to collect any runoff, but sometimes your setup may require pumps and holding tanks for the runoff.

• Start simple

If you’ve never done a vertical grow before, it is best to start slow and simple; you can always extend your operation later. Using two tiers in the beginning should be enough to keep you busy. Usually, if you use more than two tiers, the grow will become much more difficult in terms of design and functionality. Three or more tiers will complicate your vertical grow and require much more advanced—and therefore costly—cooling and ventilation equipment. Moreover, keeping it simple at first will ensure a much safer growing and working environment so that you can get the most out of your operation.

The Perfect Light Schedules For Autoflower Cannabis

WHAT’S THE BEST LIGHT SCHEDULE FOR AUTOFLOWER CANNABIS?

Autoflowering cannabis strains flower based on age, rather than a change to their light cycle. Nonetheless, providing your autos with the right amount of light remains crucial to ensuring the best possible harvest. Read on to learn all there is to know about lighting for autoflower cannabis strains.

18/6 LIGHT CYCLE

Cannabis is a C3 plant, meaning it can absorb CO₂ for photosynthesis even during light hours. And since autoflowering plants have short vegetative phases and often grow shorter than photoperiod strains, you’ll typically want to give your autos at least 18 hours of light. This allows for robust growth, without overspending on energy. Your autos love light just as much as traditional photoperiod strains, they just don’t rely on it to begin bloom.

24HR LIGHT CYCLE

Some growers will even give their autos a full 24 hours of light, arguing that this helps maximise vegetative growth. Growers who stick to 18-hour light cycles, on the other hand, argue that this gives their plants a short “recovery” period that is essential for healthy growth. 

There’s no real consensus on whether autos grow better under 18 or 24 hours of light, and we’ve seen growers achieve great results with both methods. To make up your mind, we recommend playing around with both variations and sticking to what works best for you.

WHAT ABOUT A 12/12 LIGHT CYCLE?

Some growers still decide to keep their autos under a 12/12 light cycle during flowering. And that’s fine, as autos grown in these conditions can still produce a fair harvest. Just remember that the buds you harvest under a 12hr light cycle will be noticeably smaller than what you’d get under a 18–24hr cycle. Some reasons you might consider keeping your autos under 12/12 include:

  • Heat concerns: If you live in a very hot climate, you might want to turn your grow lights off during the day to avoid overheating your grow room. In that case, growing your autos under a 12/12 light cycle—with lights on during the night—might be your best bet to avoid causing your plants heat stress.
  • Growing autos alongside photoperiod strains: If you’re growing autos alongside feminized photoperiod strains, you’ll likely have to place your autos in the same room as your flowering feminized plants, meaning your autos will only get 12 hours of light per day.
  • To save money: Running grow lights for 18–24 hours over a few months can get very expensive. If you want to grow autos on a tight budget, you might want to use a 12hr light cycle instead.

PERFORMING SOG WITH AUTOFLOWERS

SOG, or sea of green, is a cannabis training technique that can produce some great harvests. Rather than getting your plants to grow as large as possible, SOG involves growing several smaller plants in close proximity to form a uniform canopy that maximises light exposure and space.

SOG is a great technique to try with autos because it takes advantage of the naturally smaller stature of these varieties. While every grower will have their own technique for SOG, most will grow between 4–16 plants per m², depending on how big they let each plant grow.

Depending on the size of the particular strain you’re growing, we recommend using 7–10l pots and growing between 4–6 plants per m². This should make the most of your space and lighting while still providing your plants with enough airflow to avoid any mould issues. If you decide to grow more plants per m², remember to use smaller pots to control their size and avoid overcrowding your grow room.

What Exactly Is Hidden Hunger

A quick look around and all your plants look great…every one appears healthy and green, with no apparent signs of a problem like yellowing leaves or brown spots. You exhale, thinking you’re on the right track and all your hard work will pay off shortly when you’re rewarded with a bountiful harvest. But then harvest rolls around, and the yields are much less than you expected.  You’re standing there left scratching your head.

Does this sound familiar? First off, let me say you’re not alone; it often happens to growers with all experience levels. Second, chances are the disappointing yield resulted from a sneaky phenomenon known as hidden hunger.

What do your plants need to grow?

Before we talk about the ins and outs of hidden hunger, let’s take a minute to talk about what your plants need to grow. We’re taught in high school biology class they need water and sunlight. Most of us are familiar with fertilizers, too, but we may be a little fuzzy on exactly why fertilizers are needed.

Just like us humans, plants have a “diet” of sorts containing specific nutrients (the science types call them plant essential nutrients). These nutrients all have distinct roles in the plant and are required for plant growth.  Sometimes these essential nutrients have similar functions, sometimes the functions are particular to one nutrient, and sometimes the nutrients work together in harmony. Regardless of the nutrient or its role within the plant, if it’s lacking, the plant is affected somehow.

There are 17 different nutrients deemed essential for plant growth; they are classified as macronutrients or micronutrients, depending upon the concentration needed in the plant.

  • Macronutrients are needed in greater concentrations.
    • Primary macros include carbon (C), hydrogen (H), oxygen (O), nitrogen (N), phosphorus (P), and potassium (K).
    • Secondary macros are calcium (Ca), magnesium (Mg), and sulfur (S).
  • Micronutrients are as critical as the macros but are needed in lesser concentrations.
    • Micros include boron (B), chlorine (Cl), copper (Cu), iron (Fe), manganese (Mn), molybdenum (Mb), nickel (Ni), and zinc (Zn).

What exactly is hidden hunger?

Now that we’ve talked about essential nutrients let’s dive into hidden hunger. Simply put, hidden hunger is when a plant is experiencing a nutrient deficiency, but the naked eye does not see physical symptoms. The drawback, though, is the plant is already responding internally in the form of future yield reductions.

Simple terms please…what is hidden hunger and what is it doing to my plants?

Your plants are getting adequate nutrition for growth. They have pulled from the soil (or nutrient solution if you’re growing hydroponically) at least the minimum amount of nutrients they need to prevent outward deficiency symptoms. They aren’t getting optimal nutrients, though. This bare minimum means they are barely surviving. There is no extra to put towards future growth like flowering and fruiting, so yields will be impacted.

Along with not saving for their future, your plants are “hangry.” As we all know, this means they won’t respond well to pest or disease attacks, which can further reduce yields.

The dilemma with hidden hunger is that it goes unnoticed until it’s too late to fix. Once visible deficiency symptoms are seen, the problem can’t be rectified completely. However, it can be prevented.

How can you avoid hidden hunger?

It is relatively straightforward to keep your plants from succumbing to hidden hunger. The main goal is providing optimal levels of available nutrients for your plants and ensuring the plants are absorbing them into their roots.

There are three strategies for avoiding hidden hunger. While each is important on its own, they are all interrelated as well.

  • Routinely check the pH of the soil or nutrient solution. If the pH is too far outside the optimal range (typically close to neutral or slightly acidic), nutrient availability is impacted. Nutrients are often tied up and unavailable for uptake. They’re in the root zone, but the plants can’t take them into the roots.
  • Keep nutrients levels adequate. Supplement your plants using your preferred nutrient product (e.g., a slow-release synthetic fertilizer, liquid seaweed, etc.) per the product directions. Ensure they are getting both macro and micronutrients.
  • Maintain good soil moisture. Nutrients in the soil have to be dissolved into water to be transported into the roots. If there isn’t enough moisture, the nutrients can’t be absorbed.

Last but not least, it is also important to make sure your plants get enough lighting as well. Check out some excellent LED grow lights on our store: https://ledgrowlight.co/shop

What’s The Difference Between LED Lights And LED Grow Lights-Part II

To discuss the differences between LED lights and LED grow lights, we first have to explain both light sources in depth. Then we can compare them. In the last blog, we shared some information about LED lights, let’s start with LED grow lights today:

LED Grow Lights

Next, we’ve got grow lights. Plant owners will use grow lights if a plant needs an extra light source besides the sun or if the plant cannot get access to the sun for any reason. For instance, maybe you grow a plant at work and you’re in a cubicle.

Grow lights, although artificial, try to mimic the sun as naturally as possible. In doing this, you typically have a varied light spectrum available for your grow lights. Besides the color spectrum, it’s also possible to have control over the color temperature and the luminous efficacy with grow lights.

What is all that? Good question. Color temperature is a means of defining different light colors and feels. It’s always represented in Kelvin or K. The lowest light temperature is 1,000K and the highest 10,000K. A warm white color has between 2,000K and 3,000K, a cool white is 3,100K to 4,500K, and a blueish daylight tint is 4,600K to 6,500K.

As for luminous efficacy, this refers to the quality of visible light you get from a particular light source. Often, you’ll see luminous efficacy expressed in lumens per watt. Our eyes have a spectral sensitivity that does not necessarily let us see every light wavelength, hence why it’s important to measure luminous efficacy.

The Differences

Now that we’ve gone into detailed explanations of both LED lights and LED grow lights, what’s the differences between them?

  • Illumination purposes: LED lights are solely used for providing illumination in a residential or commercial sphere. LED grow lights encourage plant growth.
  • Light variety: You can select from a variety of grow lights that suit your budget and needs. These include HIDs, fluorescents, incandescents, and, of course, LEDs.
  • Colors available: Here’s what we covered in the intro. Normal LEDs do have a color spectrum, but it may not be as comprehensive as that of grow lights. For instance, LED grow lights need both blue and red light spectrums. The blue allows your plant to experience vegetative growth while the red can promote flowering.

While regular LEDs are great to have at home since they last practically forever and can save you money, don’t get it confused. LED lights are not the same as LED grow lights. If you’re providing a light source for your plant, a grow light will ensure they reach their full potential. That’s not to say you can’t use an LED or another non-grow light source, but grow lights work better.

Which Grow Light Should You Choose for Your Plants?

That brings us to the question of which grow light works best. We’ve already mentioned your grow light options. Is one better than the other? To answer that, let’s look at those other grow light sources and compare them to LED grow lights.

HIDs

HID lights include both metal halide and high-pressure sodium lights. While many plant owners prefer HID grow lights over other types, LED grow lights outshine them in terms of efficiency. Not only that, but HIDs don’t last as long, only about 10,000 hours. Don’t get us wrong; that’s still impressive, but it’s not as long a life as LEDs.

Also, while LED lights have their own heat control system, HIDs do not. To prevent them from getting too warm, you’ll probably need a cooling system in place. This is quite a costly investment.

Fluorescents

T5 fluorescent bulbs don’t give off as much heat as HIDs, but LEDs still manage heat better.

Incandescents

Last but certainly not least, we’ve got incandescent bulbs. Unlike fluorescents, these haven’t changed much in recent decades. The cheapest bulbs around, incandescent lights give off tons of heat, provide light in all directions, and burn out fast. They also suck up a lot of energy. You’re better off using any other type of grow light over incandescents.